 WARNING:
Clean all fuel residue from the engine compartment. If not removed, fuel residue may ignite when the engine is returned to
operation. Failure to follow this instruction may result in serious personal injury.
WARNING:
Clean all fuel residue from the engine compartment. If not removed, fuel residue may ignite when the engine is returned to
operation. Failure to follow this instruction may result in serious personal injury.
| 303-04B Fuel Charging and Controls - 1.6L EcoBoost (132kW/180PS) - Sigma | 2014 Fiesta |
| Removal and Installation | Procedure revision date: 05/1/2013 |
Removal
WARNING:
Clean all fuel residue from the engine compartment. If not removed, fuel residue may ignite when the engine is returned to
operation. Failure to follow this instruction may result in serious personal injury.
WARNING:
Do not work on the fuel system until the pressure has been released and the engine has cooled. Fuel in the high-pressure fuel
system is hot and under very high pressure. High-pressure fuel may cause cuts and contact with hot fuel may cause burns. Failure
to follow these instructions may result in serious personal injury.

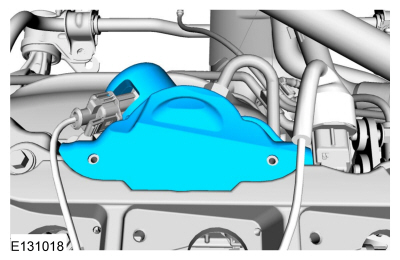
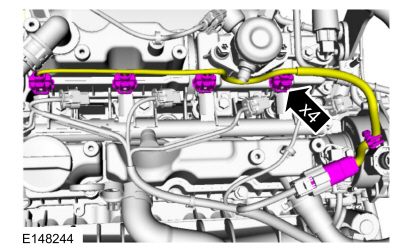
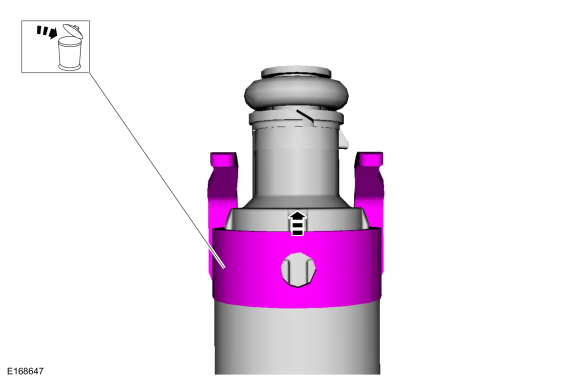
NOTE: When removing or installing the fuel injection pump noise insulator, spreading the openings will reduce the risk of damage.
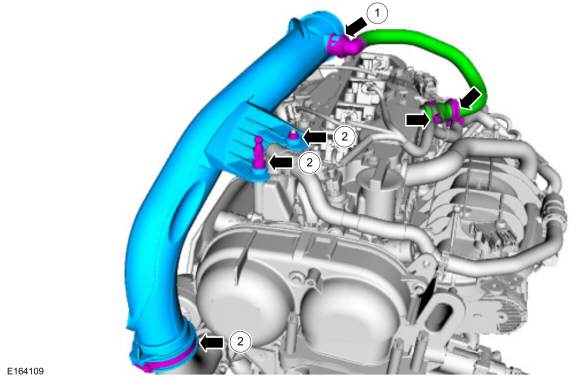
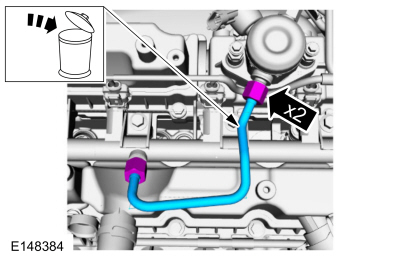
NOTICE: To release the fuel pressure in the high pressure fuel tube, wrap the fuel injection pump flare nut with a shop towel to absorb any residual fuel pressure during the loosening of fuel injection pump flare nut.
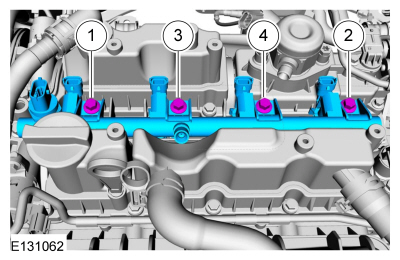
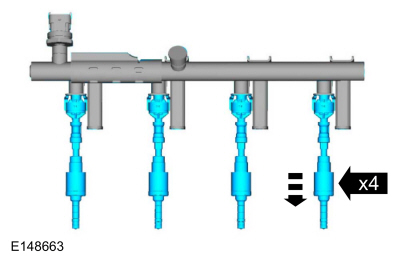
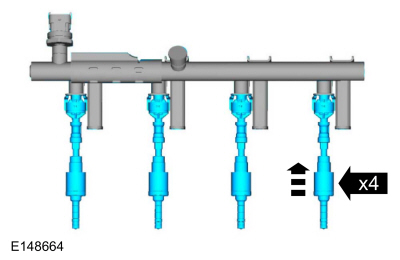
NOTICE: Pull out the fuel rails in the direction of the fuel injector axis or damage may occur to the fuel injectors.
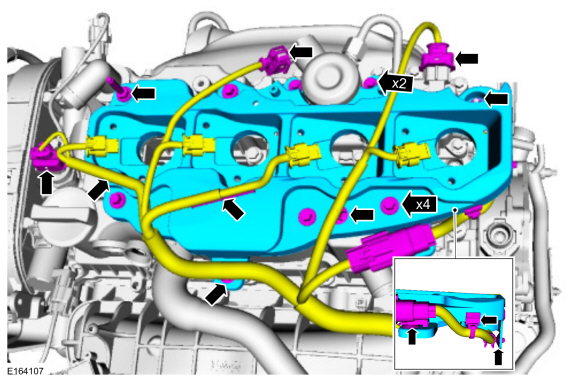
NOTE: Use compressed air and remove any dirt or foreign material from the cylinder head, block and general surrounding area of the fuel rail and injectors.
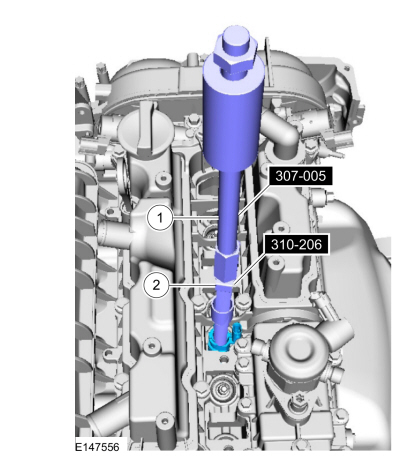
NOTE: When removing the fuel rails, the fuel injectors may remain in the cylinder head and require the use of a Fuel Injector Remover tool to extract.
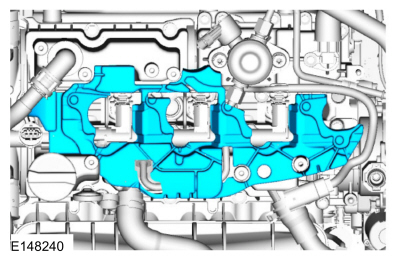
NOTE: Make sure to thoroughly clean any residual fuel or foreign material from the cylinder head, block and the general surrounding area of the fuel rails and injectors.
NOTE: Do not use compressed air to clean the tip of the fuel injector.
NOTE: Do not use a brush to clean the tip of the fuel injector.
Special Tool(s) : 310-205 Fuel Injector Brush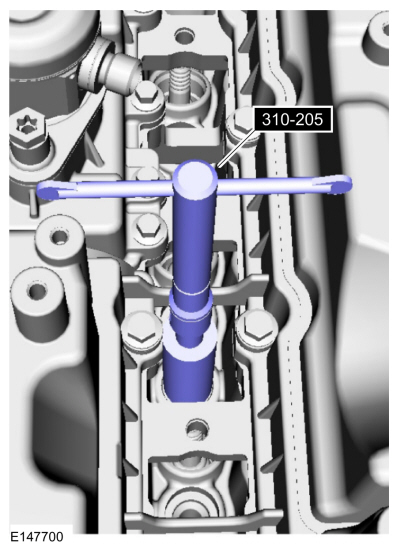
Installation
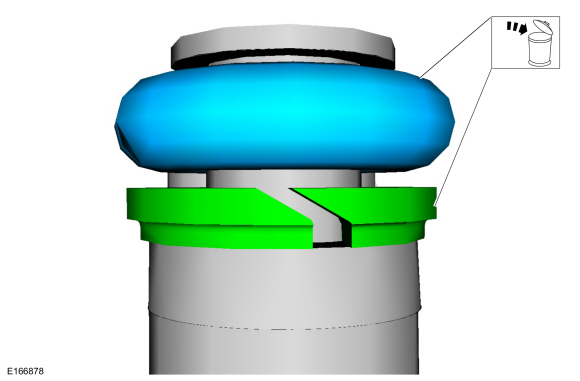
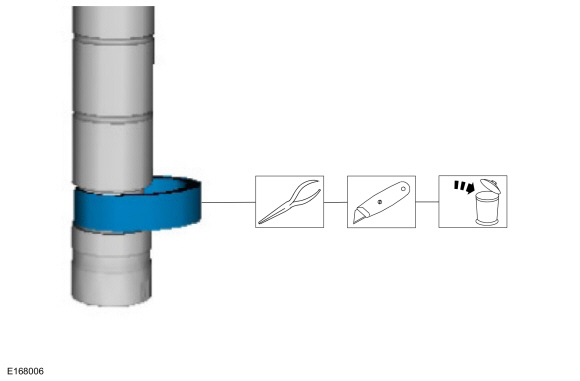
NOTICE: Use care when removing the lower Teflon® seals, not to scratch, nick or gouge the fuel injectors.
NOTICE: Do not attempt to cut the lower Teflon® seal without first pulling it away from the fuel injector or damage to the injector may occur.
NOTICE: Do not lubricate the new lower Teflon® fuel injector seals.
NOTICE: Once the Teflon® seal is installed on the Teflon® Seal Guide, it should immediately be installed onto the fuel injector to avoid excessive expansion of the Teflon® seal.
NOTE: Make sure that new lower fuel injector Teflon® seals are installed.
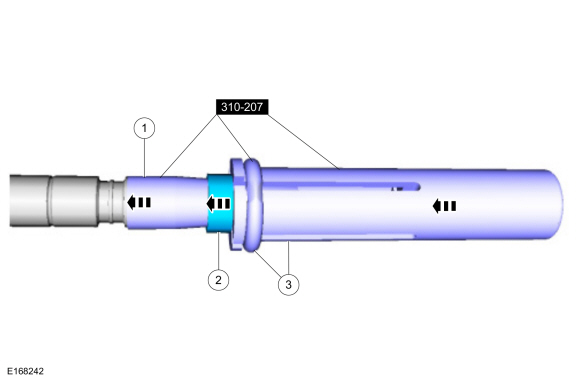
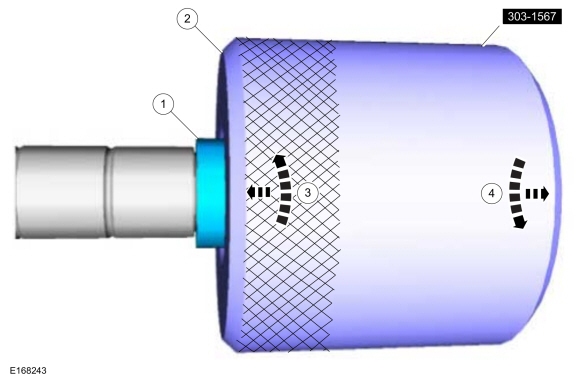
NOTICE: Install the fuel injectors into the cylinder head within 15 minutes of sizing the seals due to Teflon® seal expansion.
NOTE: Make sure the Teflon® seal is fully seated in the groove on the fuel injector before sizing the Teflon® seal.
NOTICE: Use fuel injector O-ring seals that are made of special fuel-resistant material. The use of ordinary O-ring seals may cause the fuel system to leak. Do not reuse the O-ring seals.
NOTICE: Do not lubricate the new lower Teflon® fuel injector seals.
Material : Motorcraft® SAE 5W-20 Premium Synthetic Blend Motor Oil / XO-5W20-QSP (WSS-M2C945-A)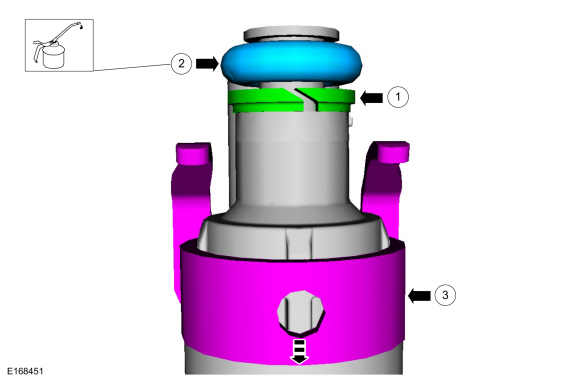
NOTICE: The FRP sensor must be replaced if it is removed from the fuel rail.
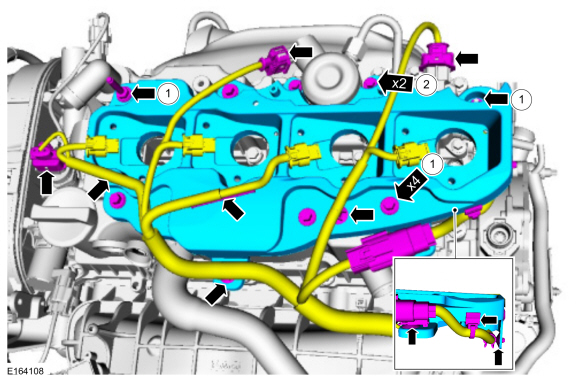
NOTE: The anti-rotation finger of the fuel injector clip must slip into the groove of the fuel rail cup.
NOTICE: Do not lubricate the new lower Teflon® fuel injector seals.
NOTE: Only tighten the 4 fuel rail bolts finger tight at this stage.
Torque :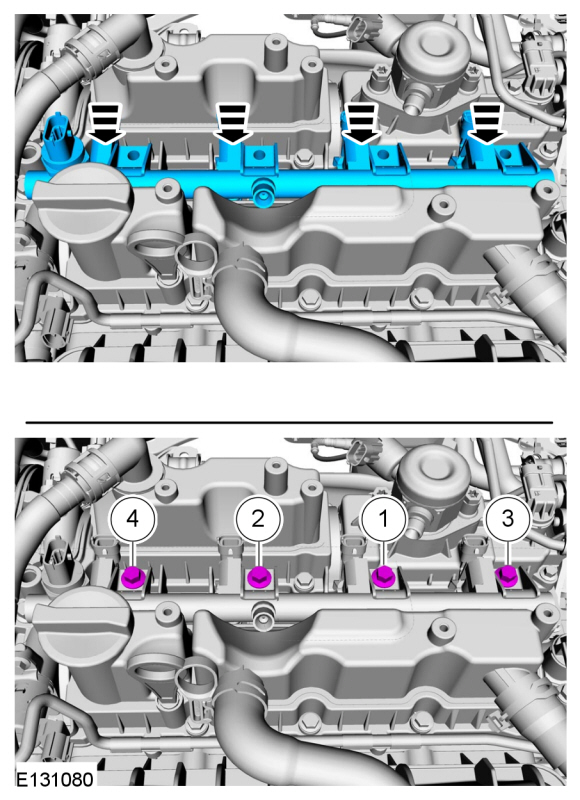
NOTE: Only tighten the 2 high pressure fuel tube flare nuts finger tight at this stage.
Install the following items:NOTE: Make sure that a new high pressure fuel tube is installed.
NOTE: Calculate the correct torque wrench setting for the following torque using the Torque Wrench Adapter Formulas.
Torque :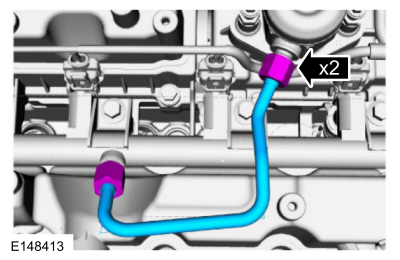
NOTE: When removing or installing the fuel injection pump noise insulator, spreading the openings will reduce the risk of damage.
Copyright © Ford Motor Company