501-25 Body Repairs - General Information 2014 Fiesta
General Procedures Procedure revision date: 07/2/2013

Plastic Repairs

NOTE: Plastics Identification

  1. WARNING: Before beginning any service procedure in this section, REFER to Safety Warnings in section 100-00 General Information. Failure to follow this instruction may result in serious personal injury.

    Refer to: Body Repair Health and Safety and General Precautions (100-00 General Information, Description and Operation).
  1. NOTE: In some instances, a code or material designation is moulded or stamped on the component indicating the plastic type.

    Thermoplastics are solvent reactive. Types of thermoplastics include Thermoplastic Olefin (TPO), PVC , Sheet-Molded Composite (SMC) and ABS (Acrylonitrile Butadiene Styrene). Polyolefins have an oily or waxy appearance. Examples include some bumper covers, stone shields, fender aprons and fan shrouds. Polyolefins require an adhesion promoter prior to carrying out any refinish procedure.
  1. To determine if the part is a polyolefin, grind the damaged area in an out-of-sight area. Grinding a polyolefin will melt and smear the plastic and leave a ragged edge. If the part is non-polyolefin, the area will grind or sand smoothly, producing a powdery dust.
  1. Polyolefin plastic can also be identified by placing a small sliver in a container of water, if the sample floats, it is a polyolefin plastic. A non-polyolefin will sink when placed in a container of water.
  1. Generally, thermosetting plastics are rigid or semi-rigid. Sheet-Molded Composite (SMC) is reinforced with glass and other fibers and are strong and rigid. Sheet Molded Composite (SMC) is used for large panels such as hoods, liftgates, fenders and quarter panels.
  1. A burn test can be a reliable method to determine if a plastic is a thermosetting plastic. Extreme care must be exercised when using this method. Apply an open flame to the corner of the damaged component. If the material crystallizes and becomes hard, it is a thermosetting plastic.
  1. In deciding whether to repair or install a new component, follow these guidelines.
  1. Is a part readily available? Can the damaged part be economically returned to its original strength and appearance, or will the labor cost exceed the cost of a new component? Will repair provide for the fastest, highest quality repair?
  1. NOTICE: Never apply solvents such as lacquer thinner or reducer at any stage of plastic repair. Solvents, cleaners and water are absorbed by many types of plastics and by the glass fibers used for reinforcements. If this occurs, the plastic may swell in the area of repair and cause the repair to fail. Remove cleaners and water quickly and use air and heat to speed up drying.

    NOTICE: During the repair of many plastics and particularly polyolefin plastics, an adhesion promoter must be applied to the substrate to allow repair materials and paint to bond correctly. Reapplication is required when grinding or sanding through the sealer or primered layers.

    NOTE: When possible, it is recommended to carry out as much of the plastic repair as possible on the vehicle. Parts mounted on the vehicle are held in correct alignment throughout the repair. Attempting to repair the part off the vehicle may cause misalignment. This could lead to failure of the repair.

    NOTE: Always refer to the manufacturer's label directions for the type of repair materials, fillers and bonding agents being used as they are material specific.

    NOTE: The following procedure applies to repair of structural cracks and large gouges. If damage is cosmetic, use of reinforcing cloth may not be necessary.

    Panels to be repaired should be dry and at room temperature 18 C (64.4 F) to 24 C (75.2 F) prior to carrying out any repairs. Both sides of the panel must be thoroughly cleaned before sanding or grinding.

NOTE: Sheet Molded Composite (SMC) Panel Repair

  1. Cover the break in the Sheet Molded Composite (SMC) (front and back) with masking tape. This protects the damaged area from absorbing the prep cleaner and eliminates wicking of the cleaner through the fibers into the Sheet Molded Composite (SMC).
  1. Remove all waxes, silicones, dirt and road oils from the area surrounding both sides of the damaged area with a plastics wax and grease remover.
  1. Remove the tape and sand the back of the repair area with an angle grinder, Dual Action (D/A) sander or by hand using 80-grit sandpaper. Remove all dust with a vacuum and tack cloth.
  1. Create a reinforcing patch using a piece of scrap Sheet Molded Composite (SMC) that conforms well to the back of the damaged area or form a patch from fiberglass cloth.
  1. Cut a section of cloth large enough to cover the repair, plus around the repair area. Cut a section of plastic film backing approximately larger than the cloth. Lay the plastic on a smooth, flat surface where it will be used to create a pyramid patch.
  1. Follow manufacturer's directions and apply adhesive to the plastic film backing and smooth with plastic spreader to recommended thickness. Place the pre-cut fiberglass cloth on the adhesive-coated plastic film. Cover the cloth with a coat of repair adhesive and spread to the recommended thickness.
    Material : Plastic Bonding Adhesive / TA-9
  1. Apply the prepared patch to the backside of the panel and compress. Follow manufacturer's instructions for adhesive cure. Remove plastic film after adhesive cures and sand as necessary to remove roughness.
  1. Remove masking tape from the front side of damaged area and grind down to the backing patch. Use an angle grinder with a 30 to 40-grit wheel. Make a gradual taper in the area, this will prevent bull's-eyes or read-through in the finished repair. Sand prepared area with a Dual Action (D/A) sander or hand-sand with 80-grit sandpaper.
  1. Build a pyramid patch using fiberglass cloth or equivalent and adhesive. Following manufacturer's directions, apply patch to damaged area.
    Material : Plastic Bonding Adhesive / TA-9
  1. Rough-grind area to remove excess adhesive. Sand repair area with 80-grit sandpaper, making sure to cut slightly below the Sheet Molded Composite (SMC) finished surface. This will allow for a finish coat of plastic repair filler material.
  1. Apply a finish coat of plastic repair filler material per manufacturer's directions.
  1. Finish-sand, prime and topcoat using Ford-approved paint systems.

NOTE: Thermoplastic Compounds Repair

  1. Select the correct repair method by identifying the type of plastic being repaired.
  1. NOTE: Always refer to the manufacturer's label directions for the type of repair materials, fillers and bonding agents being used as they are material specific.

    Determine whether a reinforcement piece is needed as a backer on large repairs.
  1. Construct a reinforcement piece from a scrap piece of the type of plastic being repaired and follow manufacturer's label directions for the type of system being used.
  1. NOTE: The following steps are to be used as a guideline. Depending on what brand of adhesives or patch materials are used, procedures may vary slightly.

    Thoroughly clean the damaged area with wax and grease remover formulated for use with plastics.
  1. Hand sand the repair area with 80-grit sandpaper and remove any foreign material with compressed air.
  1. Apply a plastics adhesion promoter per label directions to the repair area.
  1. For small repairs, a adhesive filler can be applied to the damaged area. Follow manufacturer's directions and build layers to form a thickness above the damaged area. This will allow the area to be sanded smooth.
    Material : Plastic Bonding Adhesive / TA-9
  1. To repair large holes or cracks, measure and cut a piece of fiberglass cloth or equivalent 25.4 mm (1 in) larger than the crack or hole.
  1. Apply adhesive to the damaged area and immediately apply fiberglass cloth into plastic adhesive for reinforcement. Apply additional plastic repair adhesive for strength and shape as required.
    Material : Plastic Bonding Adhesive / TA-9
  1. Contour and sand to shape the repair as necessary. Avoid sanding through the repair.
  1. Finish-sand the area and carry out any required paint operations using Ford-approved paint systems.

NOTE: Tab Repair

  1. NOTE: Illustration is not vehicle specific.

    NOTE: Inspect the component to determine if part of it can be repaired to an acceptable level of quality of appearance, fit and durability. Will labor and material cost of the repair meet or exceed the cost of a new replacement bumper cover? If the bumper cover is determined to be repairable, proceed to the following steps.

    NOTE: The following steps are to be used as a guideline. Depending on what brand of adhesives or patch materials are used, procedures may vary slightly.

    Clean the broken tab(s) with a plastics wax and grease remover.
  1. Hand sand the repair area with 80-grit sandpaper and remove any foreign material with compressed air.
  1. Apply a plastics adhesion promoter per label directions to the repair area.
  1. Measure and cut a patch of fiberglass cloth or equivalent large enough to form the front of the tab, then slope back in a wedge shape approximately 51 mm (2 in) from original tab.
  1. Prepare the repair adhesive cloth patch per manufacturer's instructions and apply to the affected area.
  1. Immediately position the plastic repair material patch to form the tab shape.
  1. Allow appropriate cure time and shape the repair tab using a small angle sander. Use extreme care to not sand through the exterior surface.

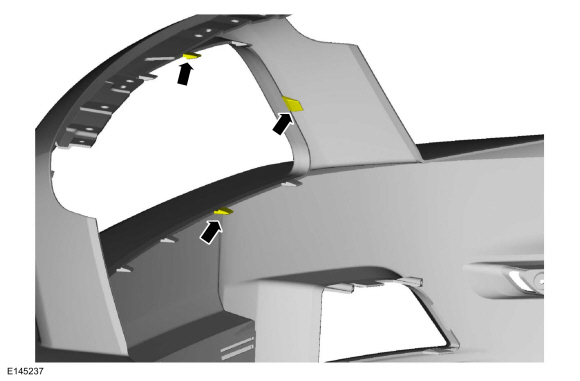
NOTE: Plastics Refinishing

  1. NOTE: Care must be used if applying heat to parts. Thermoplastics soften and tend to lose their shape when heated.

    The first step for any repair or refinish procedure is to identify the type of plastic. Is it thermosetting or thermoplastic, grained or smooth? This will determine how it should be cleaned and prepared for refinishing.
  1. It is essential that the correct cleaner is used, depending on which painting system is employed, solvent-based or water-based. Clean part with warm water/mild detergent, then with plastic cleaner to remove wax, silicone and other contaminants. Do not allow parts to remain wet for extended periods. As a general rule, if water beads on the part, it requires additional cleaning as all the manufacturing release agents have not been removed.
  1. New parts may require baking in a spray booth or heating with heat lamps to release trapped solvents or mold release agents used in the manufacturing processes.
  1. NOTICE: Grained components may only be lightly sanded through use of a gray scuff pad. Failure to follow this direction may result in graining being flattened.

    After cleaning, lightly sand with 600-grit or finer sandpaper. Remove sanding residue with plastic cleaner and wipe dry.
  1. Apply a plastics adhesion promoter to any bare plastic part following manufacturer's recommendation. Throughout the refinish procedure, any time bare plastic is exposed for any reason, it is essential that adhesion promoter be reapplied to that area.
  1. A sealer may be required to prevent wrinkling and lifting of the topcoat prior to carrying out the refinish procedure.
  1. Flexible and non-flexible components should be refinished separately as a flex additive may be required when refinishing flexible parts (refer to the paint manufacturer's recommendation).
  1. It is recommended to carry out refinishing of exterior components on-vehicle (after cut-in) to control color match and blending to adjacent panels.
  1. Interior trim components may be refinished using any Ford-approved paint system procedures. Steps may vary between paint manufacturers.
  1. Proceed with the refinish process and follow the Ford-approved paint system procedures. Steps may vary between paint manufacturers.