 WARNING:
Before beginning any service procedure in this manual, refer to health and safety warnings in section 100-00 General Information.
Failure to follow this instruction may result in serious personal injury.
WARNING:
Before beginning any service procedure in this manual, refer to health and safety warnings in section 100-00 General Information.
Failure to follow this instruction may result in serious personal injury.
| 303-01A Engine - 1.6L Duratec-16V Ti-VCT (88kW/120PS) - Sigma | 2014 Fiesta |
| Disassembly | Procedure revision date: 05/2/2013 |
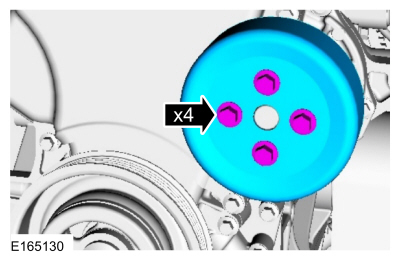
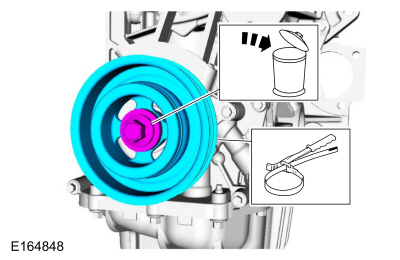
NOTICE: Do not loosen or remove the crankshaft pulley bolt without first installing the special tools. The crankshaft pulley and the crankshaft timing sprocket are not keyed to the crankshaft. Before any repair requiring loosening or removal of the crankshaft pulley bolt, the crankshaft and camshafts must be locked in place by the special service tools, otherwise severe engine damage can occur.
NOTICE: During engine repair procedures, cleanliness is extremely important. Any foreign material, including any material created while cleaning gasket surfaces that enters the oil passages, coolant passages or the oil pan, can cause engine failure.
NOTE: Refer to exploded views in Description and Operation.
All vehicles
WARNING:
Before beginning any service procedure in this manual, refer to health and safety warnings in section 100-00 General Information.
Failure to follow this instruction may result in serious personal injury.
Vehicles with manual transmission
WARNING:
The clutch disc and clutch pressure plate are heavy and may fall if not held when the bolts are removed. Failure to follow
this instruction may result in serious personal injury.
NOTICE: Do not breathe dust or use compressed air to blow dust from storage containers or friction components. Remove dust using government-approved techniques. Friction component dust may be a cancer and lung disease hazard. Exposure to potentially hazardous components may occur if dusts are created during repair of friction components, such as brake pads and clutch discs. Exposure may also cause irritation to skin, eyes and respiratory tract, and may cause allergic reactions and/or may lead to other chronic health effects. If irritation persists, seek medical attention or advice. Failure to follow these instructions may result in serious personal injury.
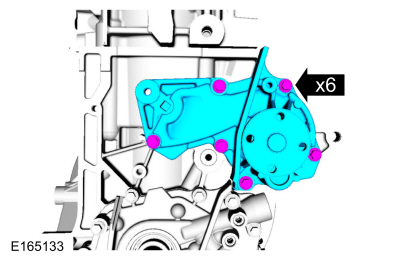
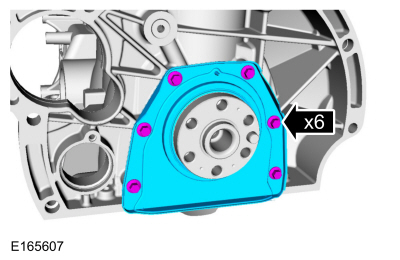
Loosen the 6 clutch pressure plate-to-flywheel bolts evenly, by 2 turns at a time.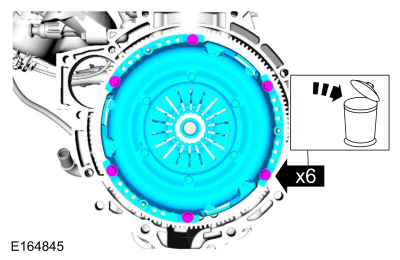

Vehicles with automatic transmission
All vehicles
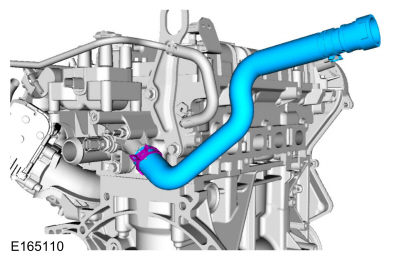
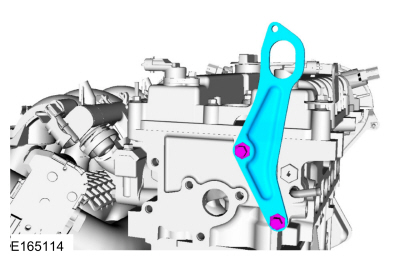
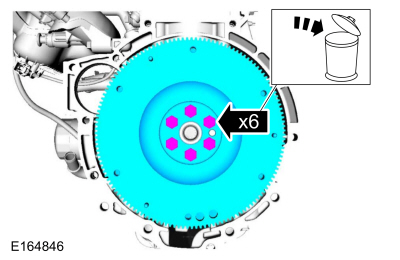
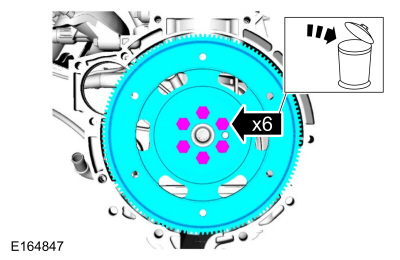
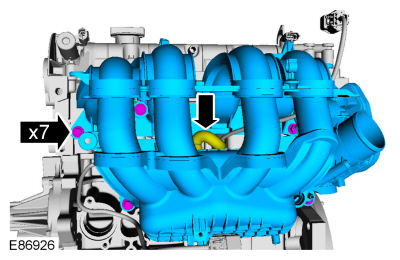
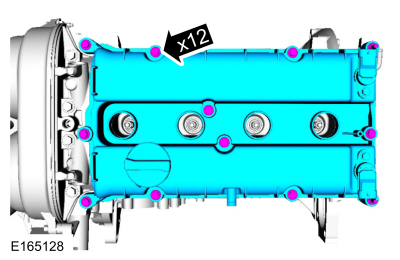
NOTE: Note the position for installation.
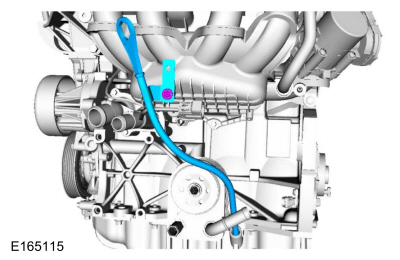
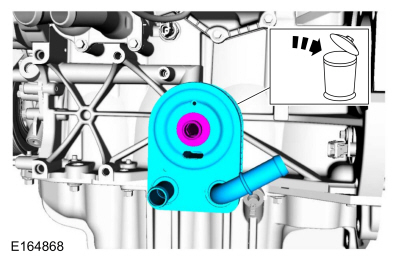
If equipped with a block heater.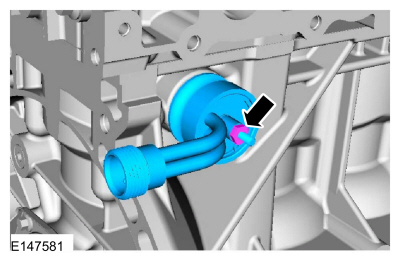

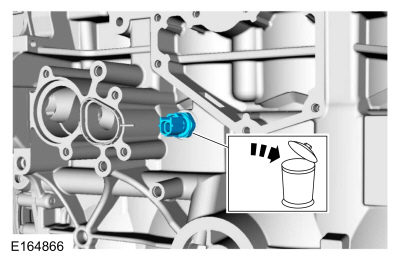
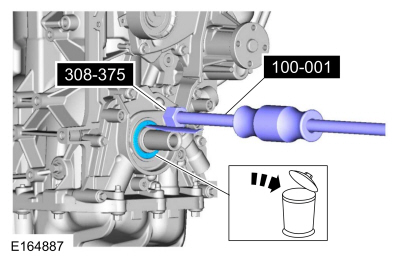
NOTICE: A new oil cooler must be installed or severe damage to the engine occur.
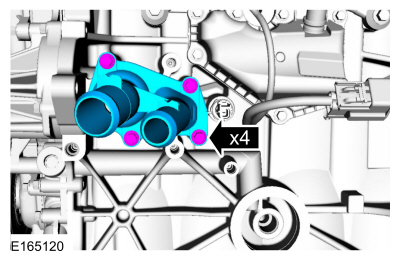
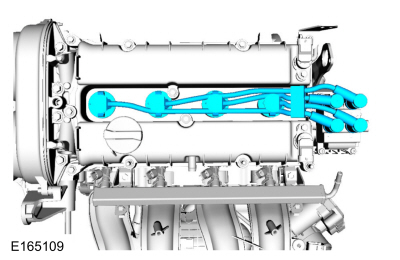
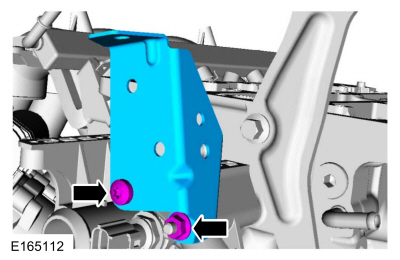
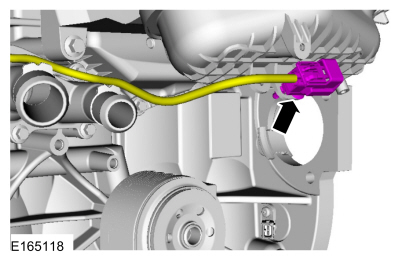
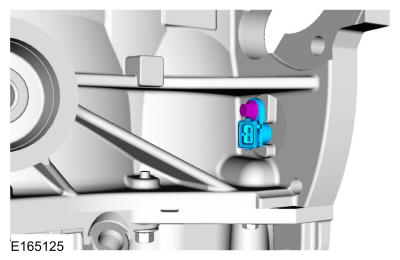
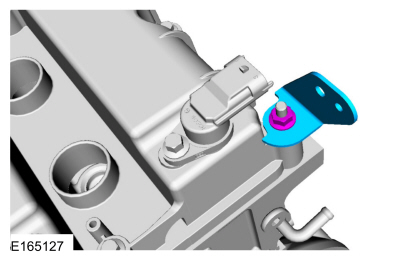
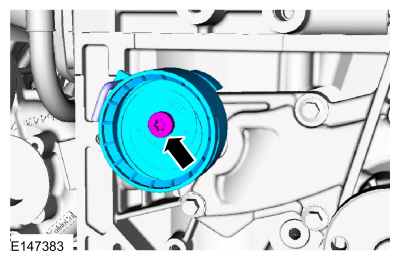
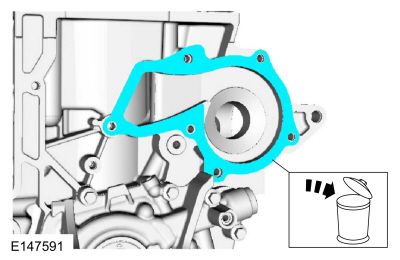
NOTE: Note the location for installation.
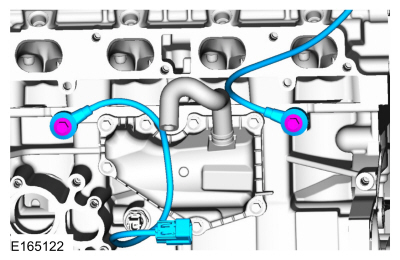

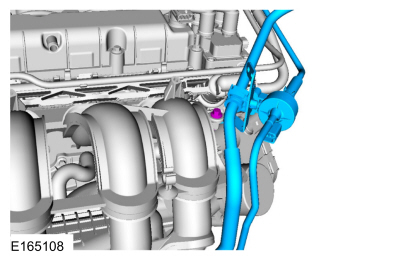
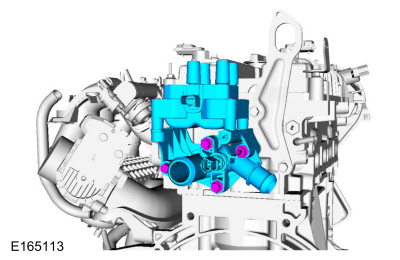
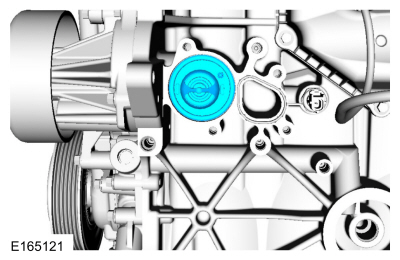
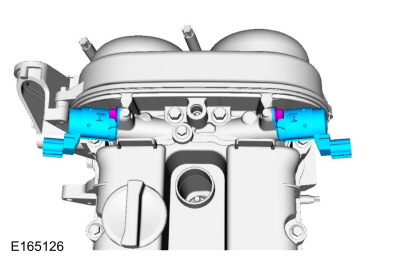
NOTE: Note the position of the component before removal.
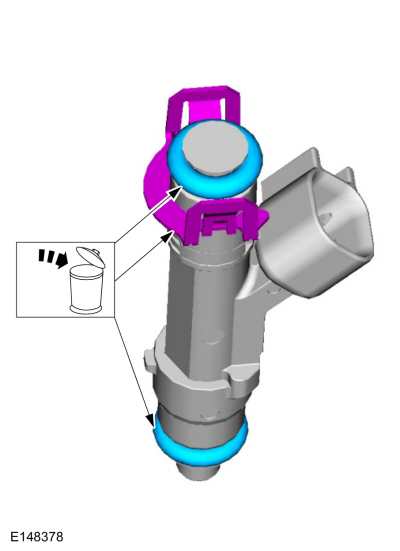
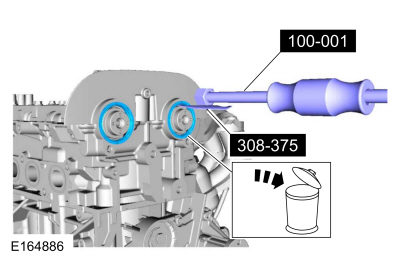
NOTE: The O-ring seals are to be reused unless damaged.

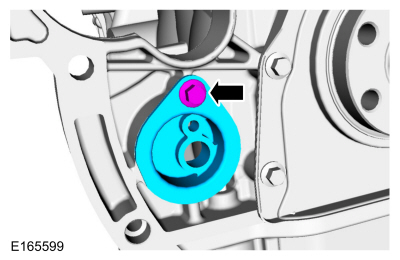
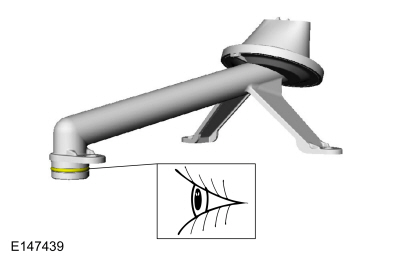
NOTE: Only rotate the crankshaft in the clockwise direction.
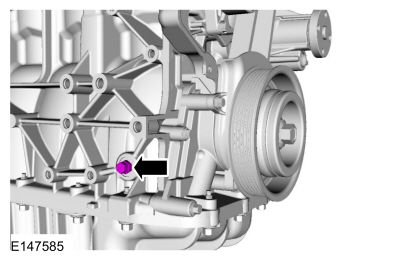
NOTE: The Crankshaft TDC Timing Pin will contact the crankshaft and prevent it from turning past TDC . However, the crankshaft can still be rotated in the counterclockwise direction. The crankshaft must remain at the TDC position during the crankshaft pulley removal and installation.
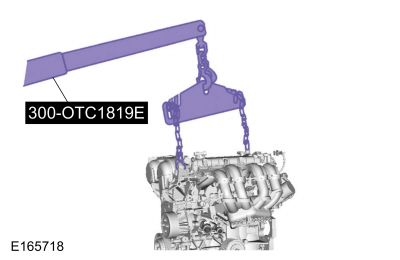
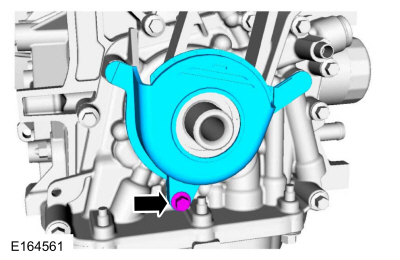
Install Special Service Tool : 303-748 Locking Tool, Crankshaft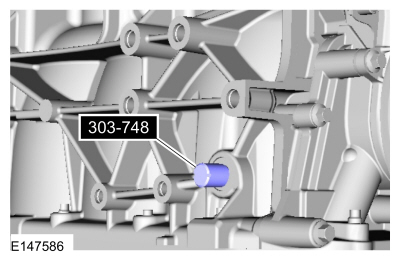
NOTE: Only rotate the crankshaft in the clockwise direction.
Rotate the crankshaft until the crankshaft balance weight is up against the crankshaft locking tool. The engine is now at TDC .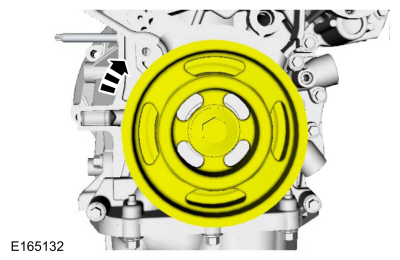
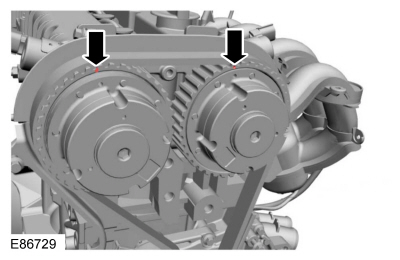
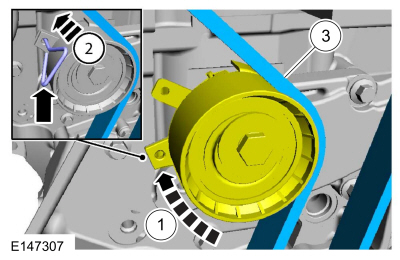
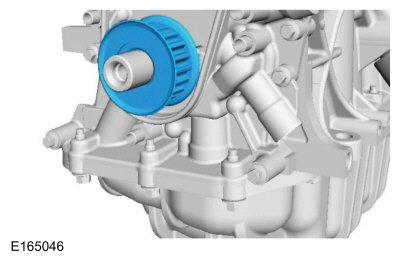
WARNING:
The timing belt tensioner spring is under load. Extra care must be taken at all times when handling the tensioner. Failure
to follow this instruction may result in personal injury.
WARNING:
The timing belt tensioner spring is under load. Extra care must be taken at all times when handling the tensioner. Failure
to follow this instruction may result in personal injury.
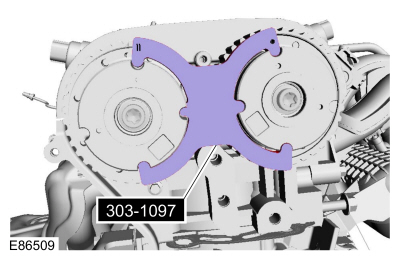
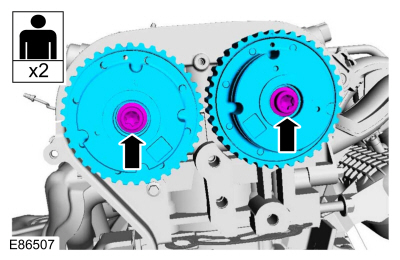
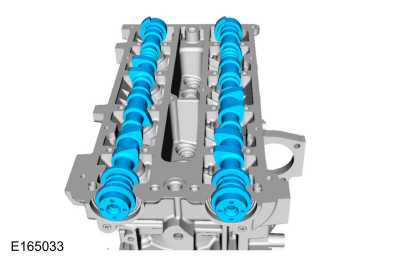
NOTE: Use an open-ended wrench to hold the camshafts by the hexagon to prevent the camshafts from turning.
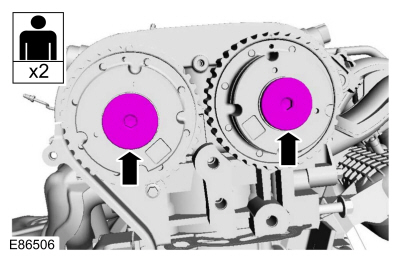
NOTE: Use an open-ended wrench to hold the camshafts by the hexagon to prevent the camshafts from turning.
NOTE: Mark the position of each component before removal.
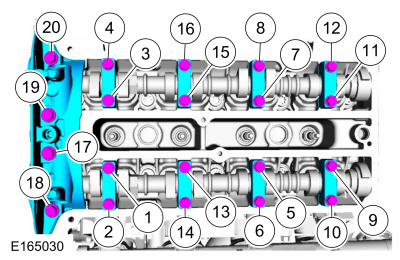
NOTICE: Do not pry on the camshafts when removing or damage to the camshafts may occur.

NOTE: If the camshafts and valve tappets are to be reused, mark the location of the valve tappets to make sure they are assembled in their original positions.
NOTE: The number on the valve tappets only reflects the digits that follow the decimal. For example, a tappet with the number 0.650 has the thickness of 3.650 mm.

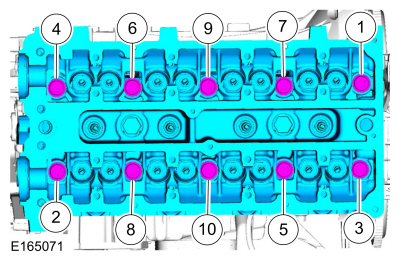
NOTE: Make sure that the cylinder head is at ambient air temperature before removing the cylinder head bolts.
NOTE: Discard the cylinder head bolts.
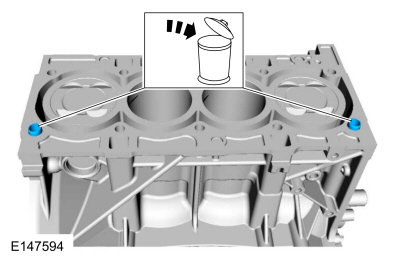
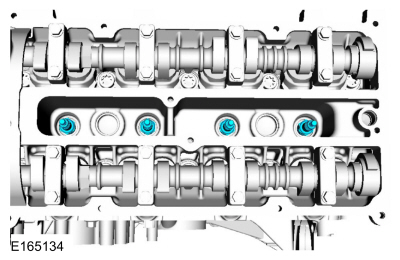
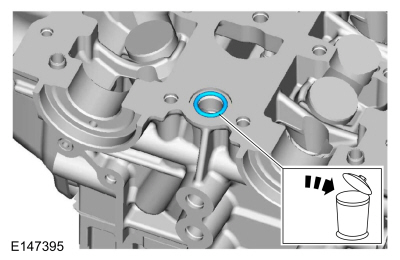
NOTE: The O-ring seal is to be reused unless damaged.
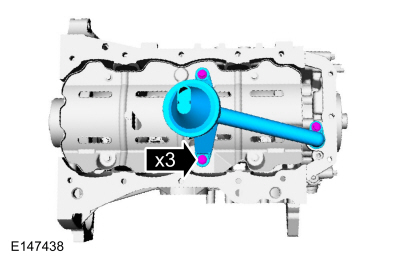
NOTE: Mark the location of the 3 different length bolts.
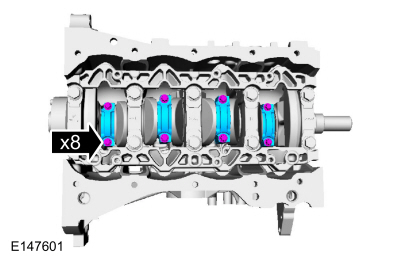
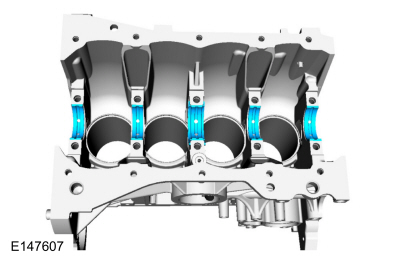
NOTE: The connecting rod cap bolts are a torque-to-yield design. The original connecting rod cap bolts will be used when measuring the connecting rod large end bore during assembly. The connecting rod cap bolts will be discarded after measurement.
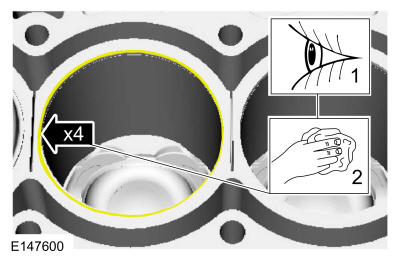
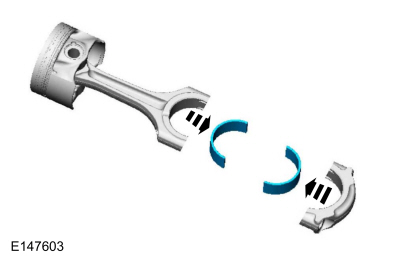
NOTE: Clearly mark the connecting rods, connecting rod caps and connecting rod bearings in numerical order for correct orientation for reassembly.
NOTE: Do not scratch the cylinder walls or crankshaft journals with the connecting rod.
Using a connecting rod installer, repeat until all the piston/rod assemblies are removed from the engine block.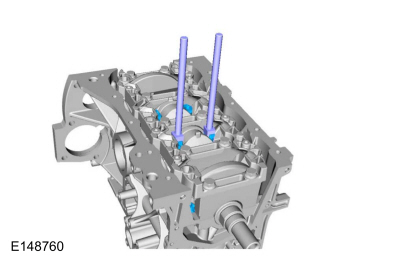
NOTE: Mark the position of the parts, so they can be installed in their original positions.
NOTE:
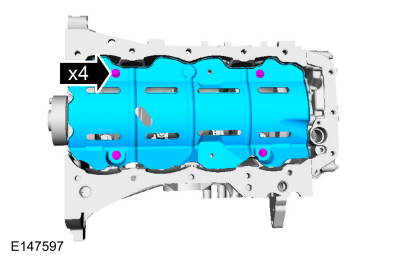
NOTE: The main bearing beam has 2 arrows pointing towards the front of engine for correct orientation for reassembly.
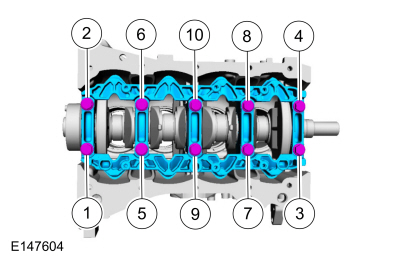
NOTE: If the main bearings are being reused, mark them in order for correct orientation and reassembly.
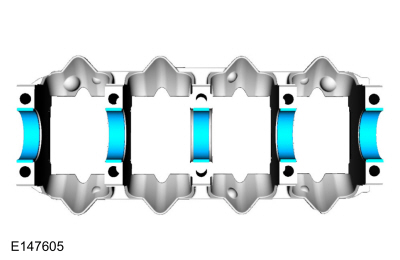
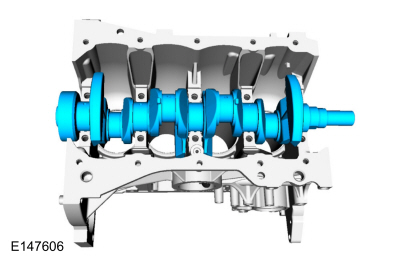
NOTE: If the main bearings are being reused, mark them in order for correct orientation and reassembly.
NOTE: The center bulkhead has the thrust bearing.
Copyright © Ford Motor Company