Aiwa CDC-MP32 Head Unit Install
06/11/03 - This head unit was originally purchased for my Subaru. I saved it from the Legacy and earmarked it for install in my new Wagon. When I checked Crutchfield's site, I saw that it fits the '03 Jetta Wagon. So I called them up and so for $48 they sent me a few DIN Removal tools (2), the antenna adapter, the wiring harness and an empty DIN slot. Since I stupidly threw away all the stuff that came w/ the Aiwa head unit, I had to order the DIN sleeve and the face plate from Aiwa's parts supplier. The DIN sleeve fit but the face plate needed some modification to fit the head unit - a tab had to be snipped off. Overall the install was pretty easy. I am a bit disappointed at the way the thing looks after the install, as it protrudes a bit from the dash. Well, it plays my MP3s and it has the AUX input right on the front (for my future iPod) which I love. Here's how I did it:
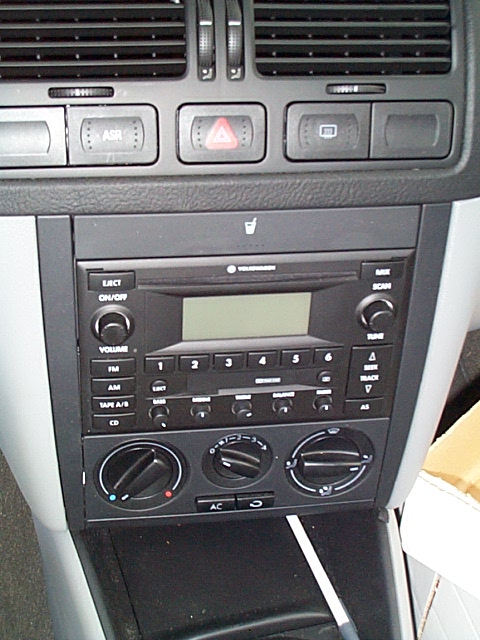 |
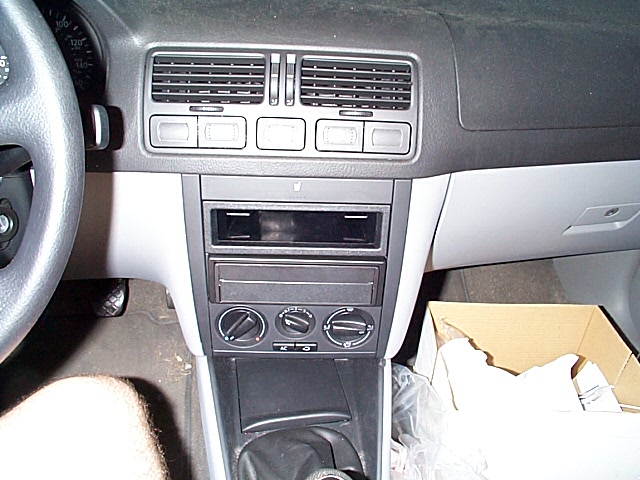
The dash, as it looked when I began. Note: slots for DIN removal tools are in 4 corners and are horizontal. Go ahead and remove the negative battery cable. | 102K |
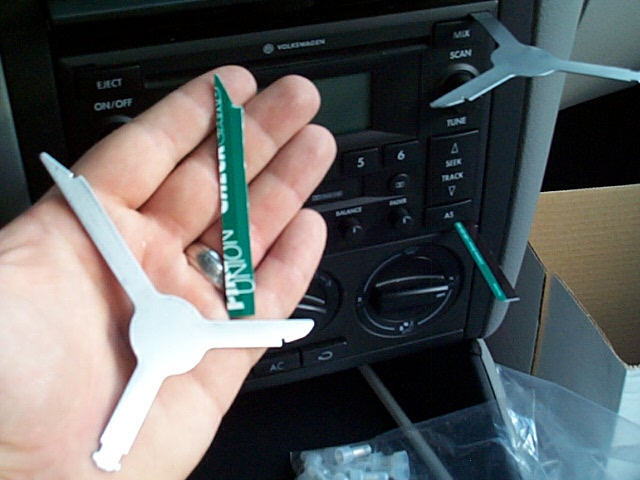 |
I only got 2 DIN removal tools from Crutchfield so instead of rounding up more, I made my own from an old credit card. I tried using a plastic card that was soft plastic laminate and it did not work! Use a hard credit card. I simply traced the DIN removal tool on the credit card w/ a utility knife and then cut with scissors and knife. It worked great! | 71K |
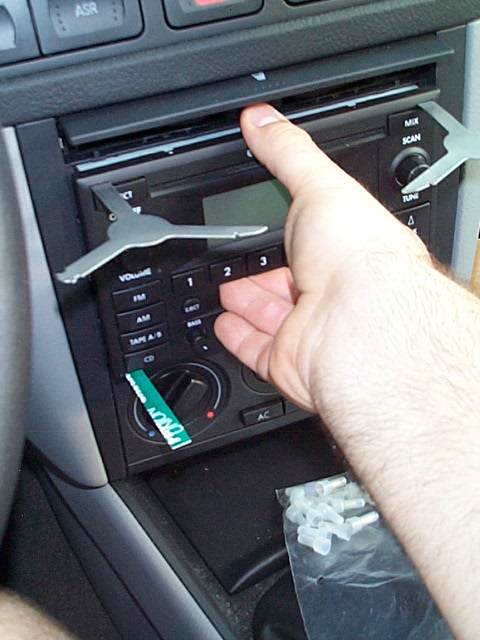 |
Here I slid the 4 DIN removal tools in. They "click" into place once they're in right. Then, I stuck my fingers into the tape slot and opened up the flap on the beverage holder to allow access to the top of the unit. The thing slid right out easily. | 71K |
 |
Here it is as it came out. The wire harness is still attached and was a little tricky to get at as it is very short. The main harness has a sort of "handle" on it (like a basket at the grocery store) which you simply flip up to release the harness. Also, pull the antenna harness from the head unit as well. | 71K |
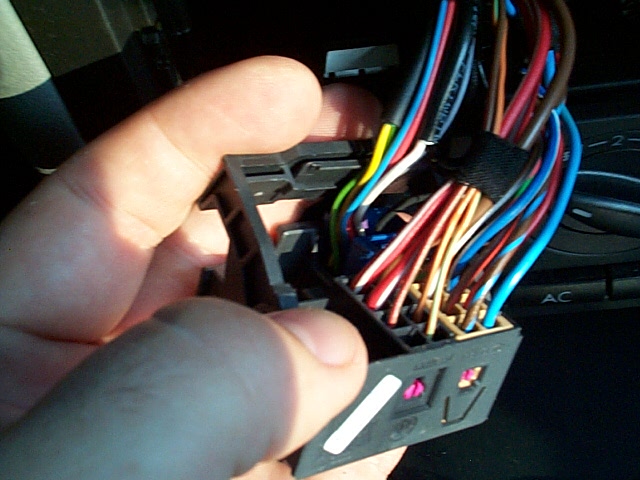 |
Here is a closeup of the basket handle thingy on the harness. It just flips up to release! | 71K |
 |
This is the inside area w/ the head unit removed. On the left the main harness, on the right the antenna harness. | 71K |
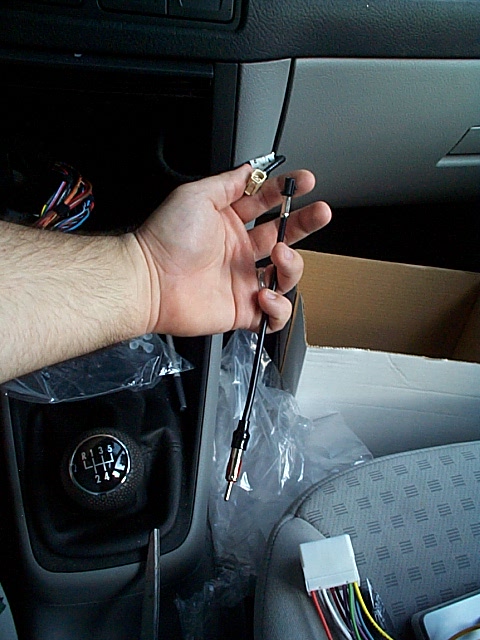 |
There's the antenna cable by my thumb and the adapter in my hand. You need the adapter in order to connect to the new head unit. | 71K |
 |
These are the wires as they were still connected to the head unit. I removed all the caps with pliers. | 71K |
 |
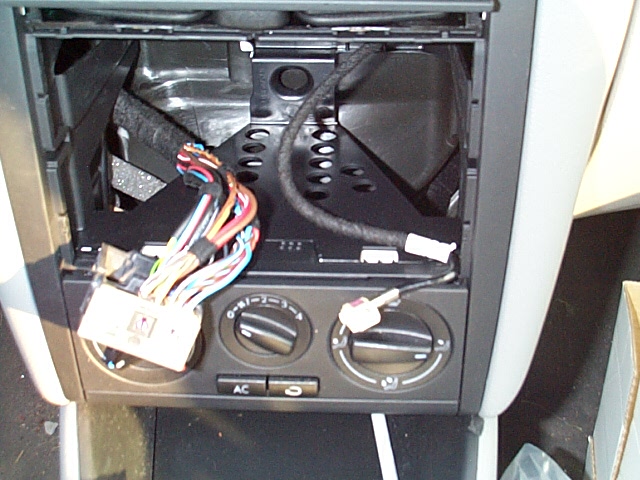
Here the caps are coming off. I now removed the section of the dash to the lower left of the steering column by undoing 2 screws at the bottom and carefully pulling the peices out. You have to be VERY gentle as you can easily damage the plastic clips that hold the peices on. You must first pull the main panel forwards, towards the seat, then pull it and the side panels (the one around the fuse box) to the left. They are actually two pieces and go back on easier if you separate them. Just be gentle here. | 71K |
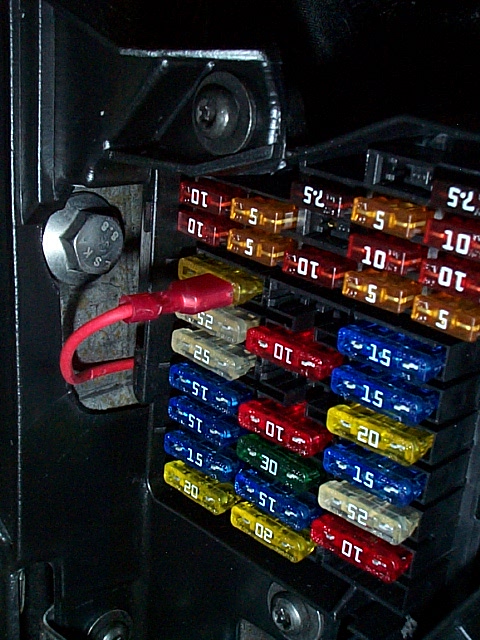 |
One of the things I didn't like about the install is that you must run a wire from the "25 Amp Windshield Wiper" fuse to the radio. I guess this is for constant power, but the windshield wipers are not always on and the fuse in my Jetta is 20 Amps for the wipers. I followed the directions, just so that I could say that I did. I will/may change this in the future. Getting this piece to fit in was a challenge as the fuses are really a tight fit. What they provide you with is a clip that slides over one leg of the fuse and you then insert the whole thing into the fuse socket. Then, I had to fish the wire thru the dash. | 71K |
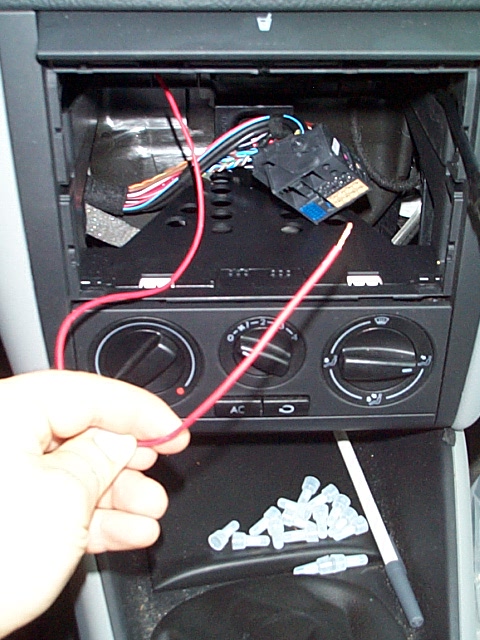 |
I fashioned a hook out of a coat hanger which was unwound. The I reached in from the DIN compartment and went under the steering column. I fashioned a loop out of the end of the red wire and inserted it into the compartment. I then went fishing for it with the hanger. It worked great. I was able to hook it and bring the wire under the steering column on my first try. Here's the wire once I got it out and all straightened up. | 71K |
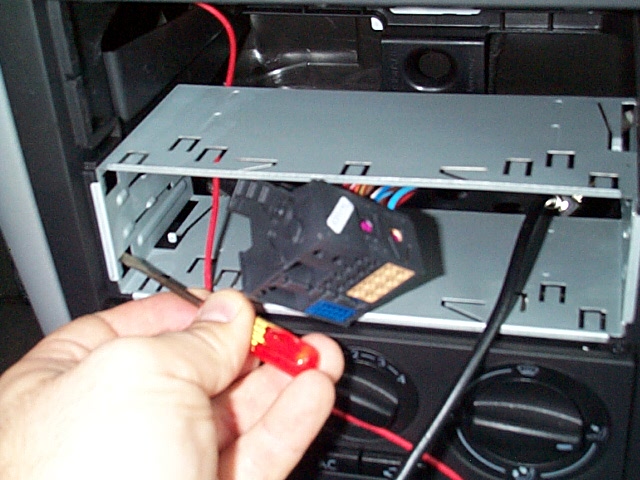 |
Here I've inserted the DIN sleeve and I'm using the small red screwdriver to bend the tabs over on each side. There are a total of 4. Make sure you bend 'em tight b/c this is what holds the radio in place. Connect the negative battery terminal. Now, hook the head unit up and test it out! It's a good time to see if everything works. Make sure to check all speakers and the antenna connection! Reconnect the battery. | 71K |
 |
Fast forward to the finish. I connected the wires on the head unit to the VW harness. Just follow the directions that come w/ the harness, and use the diagram on the head unit. Mine was totally straigforward - the color coding on all the wires matched. Next, connect the harnesses. Don't forget the antenna harness like I did! Now comes the trickiest part; finding a place for all those wires to go! It took me a while with my hand stuck in the compartment for a while, but eventually I was able to stuff them to the left and up a bit. Next, slide the head unit right in. The thing is supposed to click into place, but mine didn't really - it still can slide out easily. Oh well. Now install the DIN sleeve. Follow the directions that come with it. All you do is screw two brackets on each side and then slide the thing in until it clicks and locks into place. The sleeve that comes from Crutchfield is not really rectangular - it's tapered a bit and has shelves inside so that you could fit 3 CD jewel cases in there if you like. I really don't like the design, but overall I don't use the space that much. If you want something bigger, try one of the other manufacturers DIN sleeves. Also, with the Crutchfield taper you can more easily fit all the wires into the compartment, which is good. Lastly, slip the face trim plate on. Like I said earlier, you will have to trim a tab off of one side to get it to fit - I used wire cutters. It's pretty straightforward. |
71K |
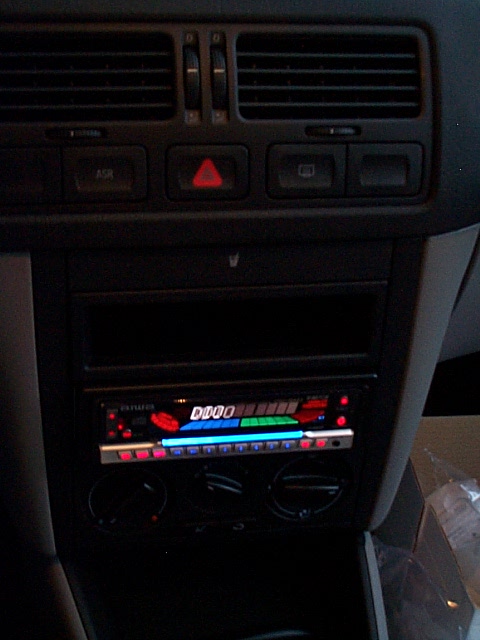 |
Everything works just fine! My only big gripe at this point is that the thing will not work when the key is in the ACC position, ie. one click forward. It only works in the ON position. OH well... I guess I need to move that red wire to a fuse that is on when the key is in the ACC position. | 71K |
 |
Another shot, w/ the interior lights on. | 71K |
 |
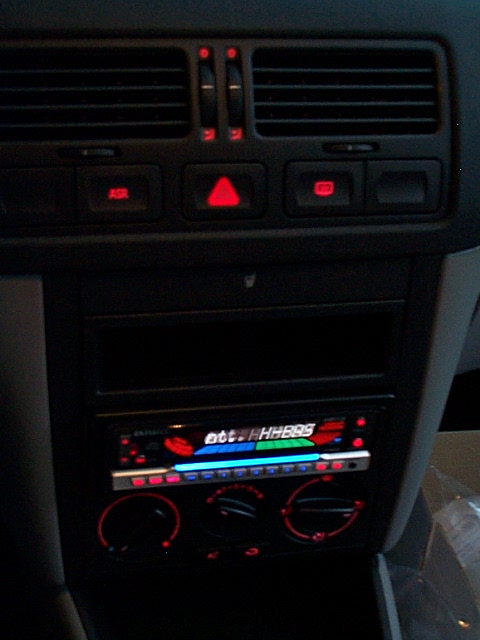
And here's one last wide shot. Overall this was an easy install and took me about 2 hours to do. Enjoy! If you have questions, email me! | 71K |
Back to the 2003 VW Jetta Wagon GLS 1.8T page
contact me - cpl_clegg *~at~* yahoo.com