501-12 Instrument Panel and Console 2014 Fiesta
Removal and Installation Procedure revision date: 09/10/2013

Instrument Panel Upper Section

Removal

All vehicles

NOTE: Removal steps in this procedure may contain installation details.

  1. Refer to: Driver Knee Airbag (501-20B Supplemental Restraint System, Removal and Installation).
  1. Refer to: Steering Wheel (211-04 Steering Column, Removal and Installation).
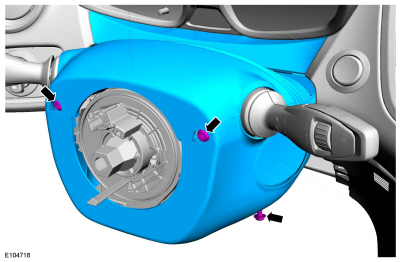
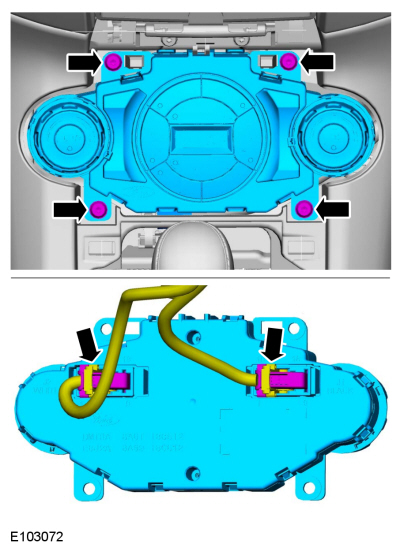
  1. NOTICE: Make sure the clockspring does not rotate.

    Use tape to prevent the clockspring from rotating.
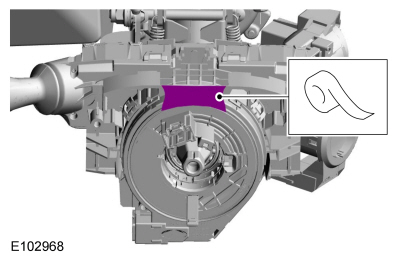
  1. Refer to: Instrument Panel Cluster (IPC) (413-01 Instrumentation, Message Center and Warning Chimes, Removal and Installation).
  1. Refer to: Headlamp Switch (417-01 Exterior Lighting, Removal and Installation).
  1. Refer to: Audio Front Control Module (ACM) (415-00A Information and Entertainment System - General Information - Vehicles With: AM/FM/CD, Removal and Installation).
    Refer to: Audio Front Control Module (ACM) (415-00B Information and Entertainment System - General Information - Vehicles With: AM/FM/CD/SYNC, Removal and Installation).
    Refer to: Audio Front Control Module (ACM) (415-00C Information and Entertainment System - General Information - Vehicles With: AM/FM/CD/SYNC/Touchscreen Display, Removal and Installation).
  1. If equipped.
    Torque : 1.2 Nm
  1. If equipped.
    Torque : 1.6 Nm
  1. Refer to: Floor Console (501-12 Instrument Panel and Console, Removal and Installation).
  1. If equipped.
    Refer to: SYNC Module [APIM] (415-00B Information and Entertainment System - General Information - Vehicles With: AM/FM/CD/SYNC, Removal and Installation).
  1. Torque : 6 Nm
  1. On both sides.
    Refer to: A-Pillar Trim Panel (501-05 Interior Trim and Ornamentation, Removal and Installation).
  1. On both sides
  1. Torque : 2 Nm

If equipped

  1. Torque : 2 Nm

All vehicles

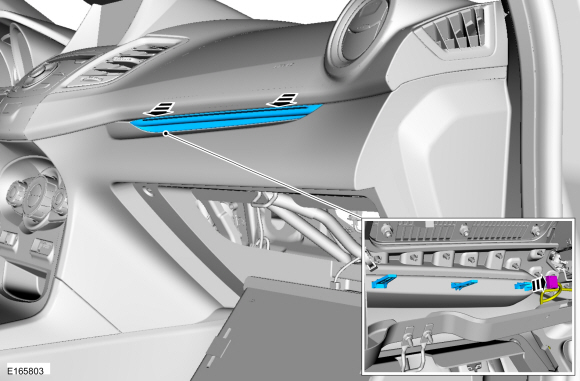
  1. NOTE: The RH and LH defroster ducts stay in the vehicle when the upper instrument panel is removed.

    With the upper instrument panel loose release the RH and LH defroster duct clips.
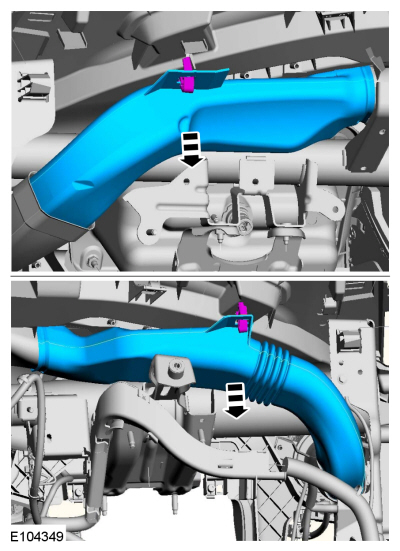
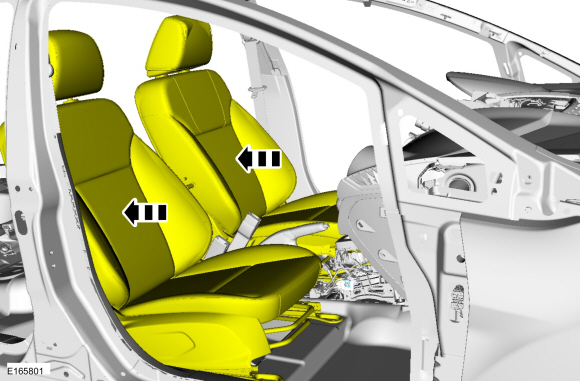
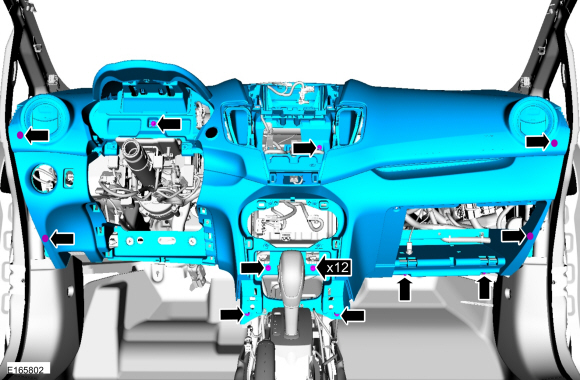
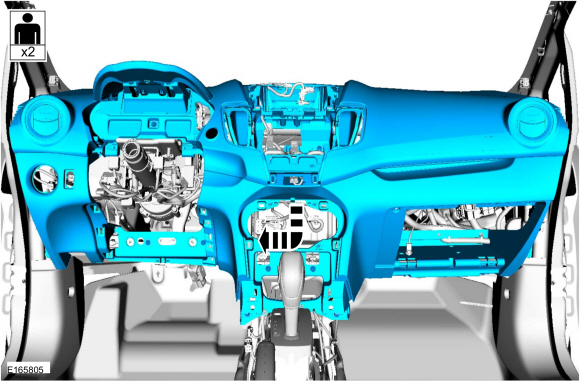
  1. NOTE: To avoid damage to the instrument panel, an assistant is required when carrying out this step.

    NOTE: Note the harness routing and make sure that all electrical connectors and wiring are not hindered before removing the instrument panel or damage to the components may occur.

Installation

  1. To install, reverse the removal procedure.