| |
| Removing
old head unit |
|
First, disconnect the NEGATIVE terminal of the car's battery.
BE CAREFUL. So here's where it begins. Back when I bought the
car I removed the stock head unit and replaced it with an Aiwa
CDC-MP32. |
| View |
|
|
| |
| |
|
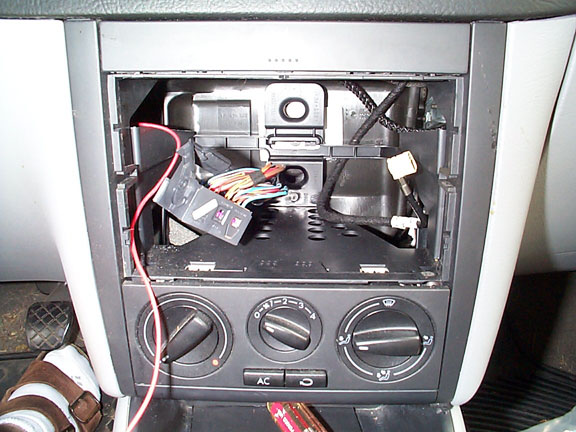
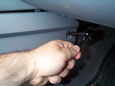
The
Aiwa unit slid right out. The DIN slot was a little tougher,
but it came out pretty easy too. I then removed the sleeve that
held the Aiwa unit in place, disconnected the harnesses and
wires. |
| View |
|
|
| |
| |

|
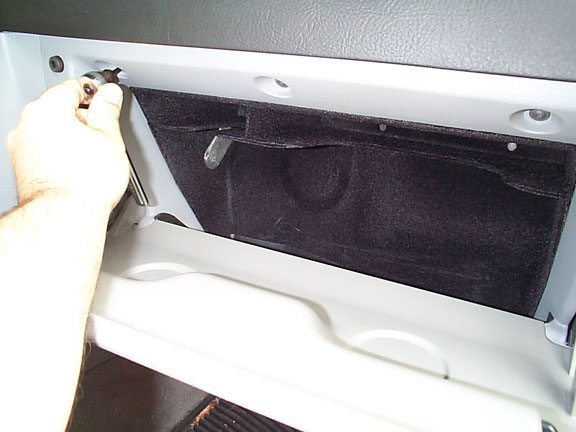
Next, open the glove box door and remove the 3 T20 torx screws
there. The glove box will then need to be pulled forward and
to the right a bit. |
| View |
|
|
| |
| |
|
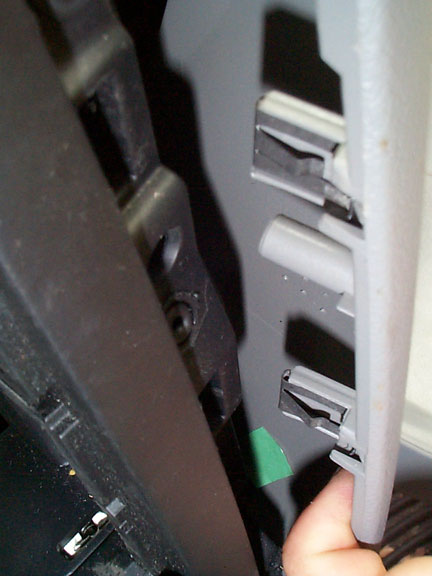
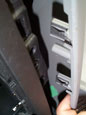
Here is a view of the left side of the glove box. The 2 tabs
need to be carefully pulled out. I used a screwdriver
to gentlypry the glovebox trim from the dash. The tabs
came right out. Again, be careful not to mar the trim around
the stereo. |
| View |
|
|
| |
| |
|
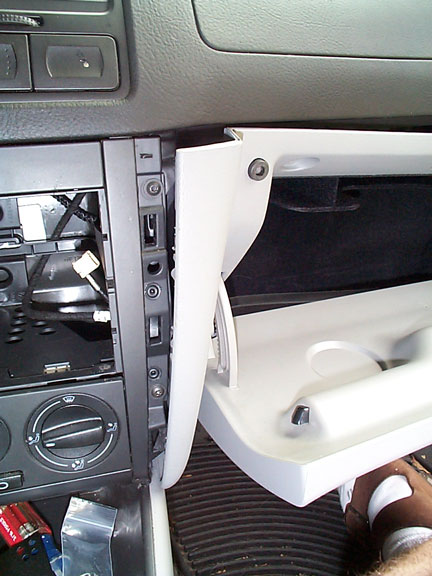
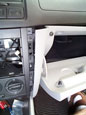
Here's a wider shot showing the loosened glove box. The glove
box doesn't need to come all the way off, just enough to gain
access to the torx screws, as seen here. |
| View |
|
|
| |
| |
|
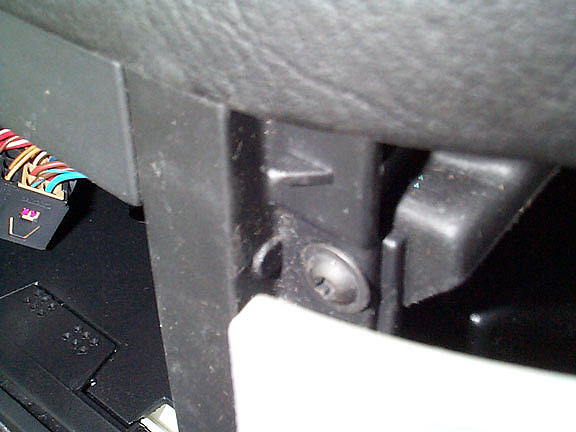
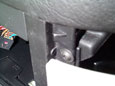
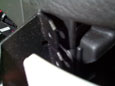
PROBLEM!
Here I ran into my first real issue. The InDash mount that
I have (which is spec'd out for my car) doesn't fit where
it should due to a small triangular plastic tab that sticks
out (seen in the center of the photo). It's there to asist
in holding the glovebox trim in place, although not an essential
piece, it will need to be removed if you are going
to install the PanaVise InDash mount! |
| View |
|
|
| |
| |
|
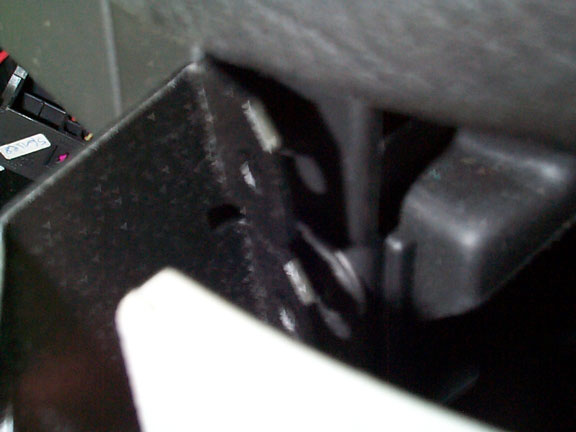
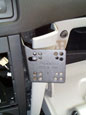
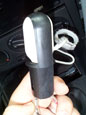
Here's a closeup of the InDash mount. You can see how it won't
fit because of the small triangular plastic piece. |
| View |
|
|
| |
| |
|
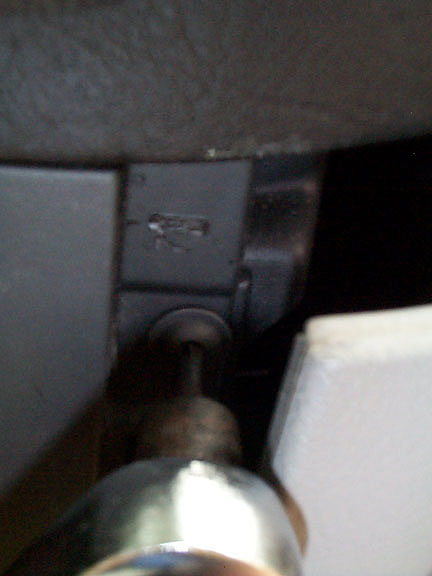
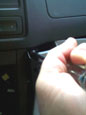
I simply scored the tab with a knife and used needle nose pliers
to snap it off. Simple. Next, remove the T20 torx screw from
the top of the trim area, just below the little triangular plastic
tab. |
| View |
|
|
| |
| |
|
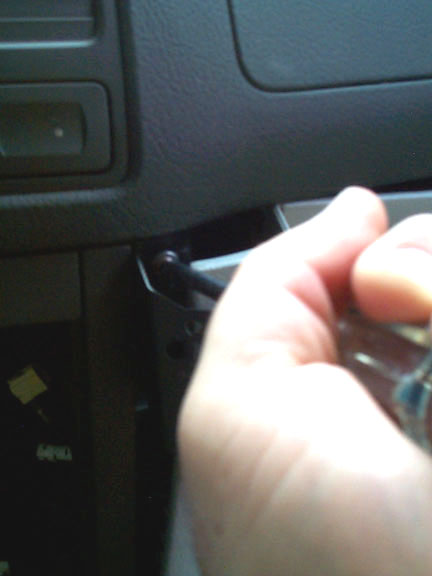
Put the InDash mount in place and tighten the lower screw. It's
a very very tight fit and I had a hard time doing this. I actually
finished up the job by using a screwdriver to hold the T20 bit
against the screw and using needle nose pliers to tighten the
screw. This is definitely one of the hardest parts of the install. |
| View |
|
|
| |
| |
|
Next, use a 3/32 drill bit and drill a pilot hole for the top
screw through the large hole in the InDash mount. Then insert
the included self-tapping philips head screw and tighten down.
That's it! |
| View |
|
|
| |
| Wiring
for the iPod |
|
To give me a little room to work, I unscrewed the T20 torx screw
on the center console trim below the glove box on the passenger
side. This allows me to get in there a little easier to fish
the wires through. |
| View |
|
|
| |
| |
|
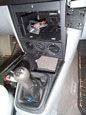
Next I needed to remove the ash tray assembly. This was pretty
easy. First, open the sliding door and remove the red tray.
Then, unscrew the screw at the base of the assembly. Next simply
lift the end nearest to the gear shift up and out. Carefully
pull the unit up and out, massaging the wires out of the way
as you lift (It's a tight squeeze). |
| View |
|
|
| |
| |
|
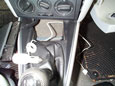
I
spent a long time contemplating where I'd like the wires to
exit the dash and run to my iPod. Some folks have drilled
holes (which must be large b/c they have to accomodate the
iPod plug), others have removed the light in the glove box
and let them feed through the hole (leave the light out, I
guess??). Still more folks have done custom installs of an
iPod Dock.
I
really didn't want to drill any holes and wanted somthing
that was simple so if I ever wanted/needed to remove/replace
the unit, I could do that easily. So, I chose to run the cable
between the two pieces of trim beneath the center dash console
(next to the AC controls). The wire snakes between the two
pieces of plastic and exits to the right. It gives me some
play room, which is nice, and hangs nicely, out of the way,
on my InDash mount when not in use.
I
will probably add a piece of tape or plastic tubing around
the cable where it passes between the trim pieces, as it is
tight and will probably, over time, damage the cable. To get
an idea of the location, look at this
picture from above. |
| View |
|
|
| |
| |
|
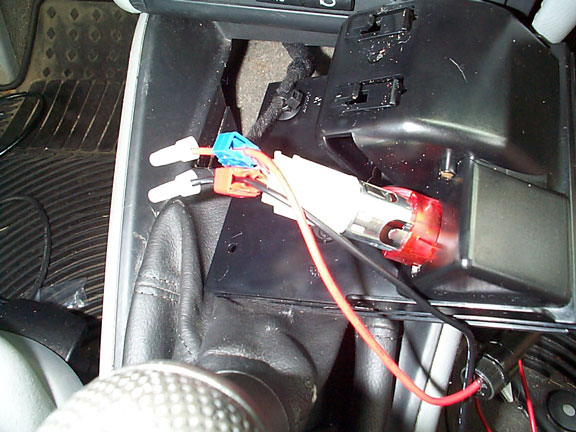
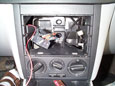
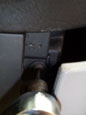
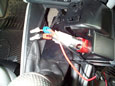
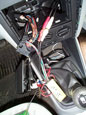
Power for the iPod is through a Belkin
Auto Kit for iPod w/ Dock Connector
F8V7058-APL. Power for the Auto Kit is from a Radio
Shack 12VDC Car Power Adapter Outlet which is tapped into
the vehicle's 12V power supply. I chose to use suitcase connectors
to tap the wires going into the 12V socket in the ash tray.
The ends of the Adapter Outlet are capped.
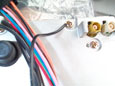
Here
are the two installed suitcase connectors. The BROWN
wire coming from the socket in the ash tray is the Ground.
The center RED
wire is the Positive
wire. |
| View |
|
|
| |
| |
|
Next,
I inserted the Belkin Auto Kit into the Radio Shack Outlet and
used some electrical tape to strap it into the outlet. I don't
want this thing wiggling loose under the dash somehow. |
| View |
|
|
| |
| |
|
A
cable tie to tidy up the leads to the Radio Shack Outlet. I
left the fuse out so it could be replaced. |
| View |
|
|
| |
| |
|
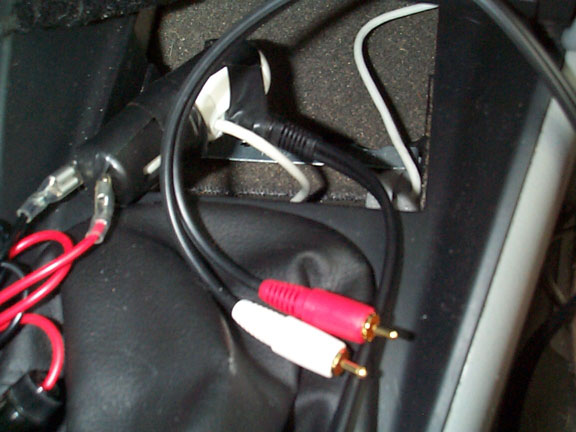
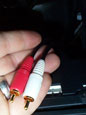
I
purchased a Radio
Shack 3' Gold Series Stereo Cable, model 42-2550 (dual RCA
- 1/8" Stereo MiniPlug) to run from the Auto Kit to the
BlitzSafe adapter. I used a piece of tape to hold the plug into
the Auto Kit to keep it from wiggling loose. |
| View |
|
|
| |
| BlitzSafe
VW/AUX DMX V.5 installation |
|
The
BlitzSafe VW/AUX DMX V.5 is an awesome little gadget. It basically
tricks your OEM head unit (and others) into thinking a CD
Changer is installed. When you click your CD Changer button
on the head unit, the BlitzSafe adapter functions as the CD
Changer but instead you have a set of female RCA plugs to
hook up whatever you want!
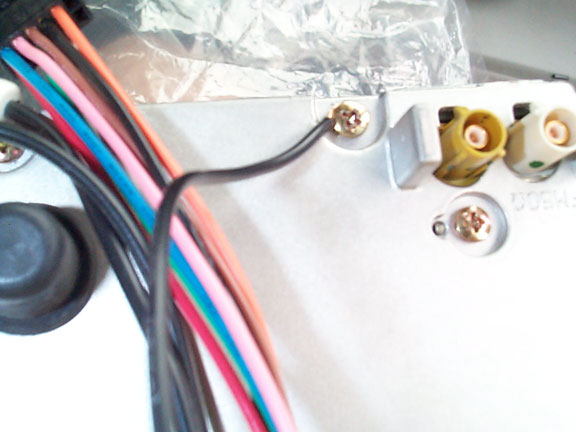
First,
I attached the GROUND wire from the BlitzSafe adapter to the
rear of the head unit. The connector that comes attached to
the BlitzSafe unit is way to large for any screw on the back
of the head unit, so I removed it, stripped the end of the
wire and ran it under a screw on the head unit (seen here).
The instructions recommend that you use a suitcase connector
to attach it to the OEM head unit GROUND wire, but at the
risk of damaging the wire, I opted not to do that. |
| View |
|
|
| |
| |
|
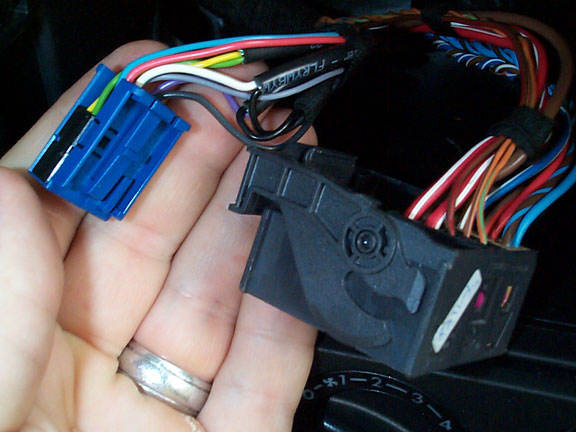
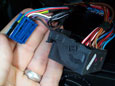
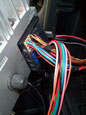
Here
we go hooking the BlitzSafe up to the OEM harness. First, we
must remove the blue harness from the larger black harness.
This is easily done by pressing the release tab on the blue
harness. |
| View |
|
|
| |
| |
|
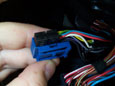
Next,
slide the black plug out of the harness to the side. There is
a release tab on the side. |
| View |
|
|
| |
| |
|
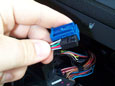
Next,
simply insert the identical plug from the BlitzSafe adapter
into the blue harness. It only goes in one way, so don't worry
about putting it in backwards. |
| View |
|
|
| |
| |
|
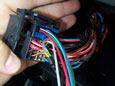
Reinsert
the blue harness into the black harness and you're done. |
| View |
|
|
| |
| |
|
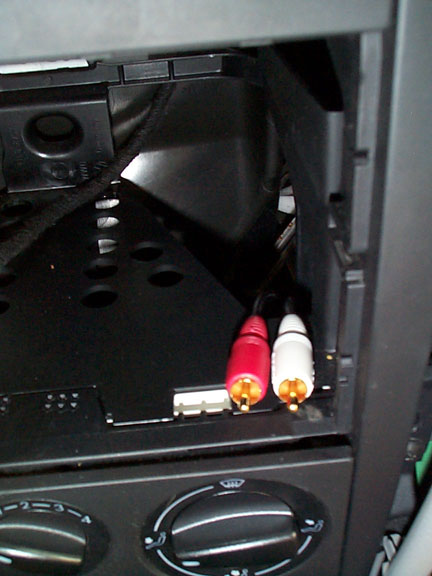
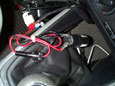
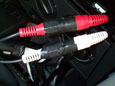
Here
are the male RCA plugs coming from the Belkin Auto Kit up the
right side of the dash and into the radio compartment. These
connect to the BlitzSafe unit. |
| View |
|
|
| |
| |

|
Here
you see where I snaked them up from below. |
| View |
|
|
| |
| |
|
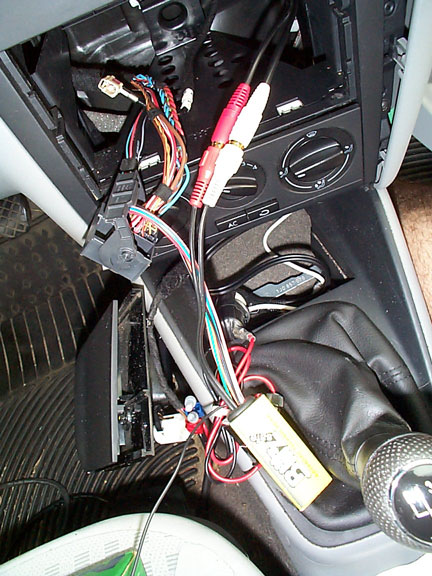
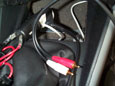
Connect
the RCA cables to the BlitzSafe adapter. This overall view shows
you most of the components all hooked up. |
| View |
|
|
| |
| |
|
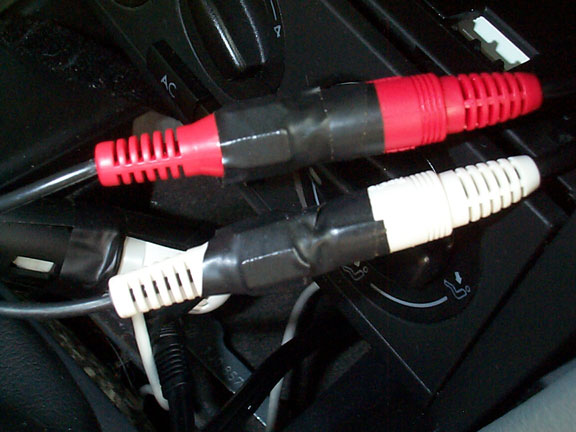
I
added some electrical tape to the RCA connections once again
to prevent them from wiggling apart over time. |
| View |
|
|
| |
| |
|
The
large black harness is reinserted into the back of the OEM stereo.
(To remove/insert the harness, you must lift up on the handle
on the one side, sort of like a shopping basket, which lifts
the harness out or locks it in, depending on which way you're
going) |
| View |
|
|
| |
| |

|
Now that everything is connected, slide the OEM unit partially
in and get ready to test the system. Reconnect the NEGATIVE
terminal on the car battery. |
| View |
|
|
| |
| |
|
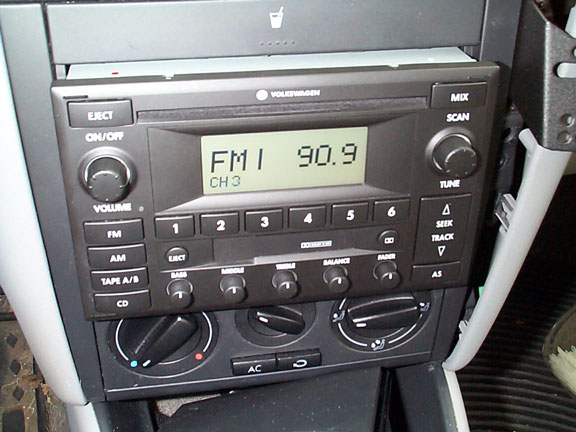
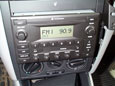
It's
alive! I had gotten an unlocking code from the VW dealership,
just in case I needed it (it's supposed to be in your VW Owner's
Manual, but if you're like me the salesperson forgot to write
it in there). I didn't. Once connected the OEM unit came to
life. |
| View |
|
|
| |
| |

|
I
clicked the CD button on the OEM head unit until the display
read "TRACK 99" which indicates the BlitzSafe adapter
is working. hooked up my iPod, got power, and clicked play
when I ran into my second problem. No audio from the Right
side! I troubleshooted the unit by switching the RCA plugs
and like I thought, the problem was in the BlitzSafe unit;
signal was coming through both Left and Right, but not passing
through the BlitzSafe unit.
Well,
thankfully I purchased this unit from Enfig
and after I sent an email explaining the situation they immediately
responded that I send it back for a replacement! HOORAY FOR
ENFIG! They rule. |
| View |
|
|
| |
| |

|
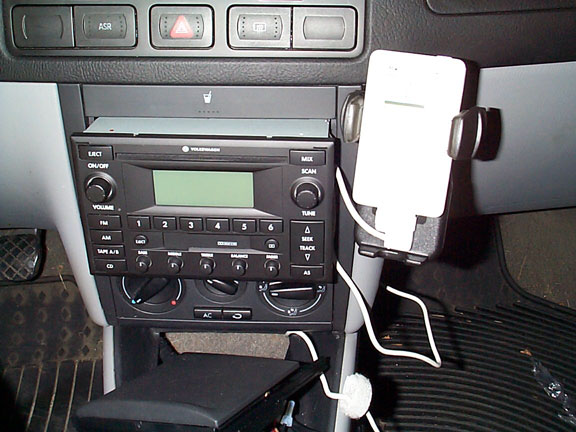
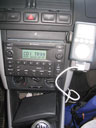
Even
though I didn't finish today, I took a shot of a near-complete
install. Stay tuned for more! |
| View |
|
|
| |
| UPDATE:
9/21/2005 |

|
Just
got back from out of town and waiting for me in my mailbox
was my replacement BlitzSafe VW/AUX DMX V.5 unit back from
Enfig. I can't tell you enough how great Enfig is. I shot
an email to them and received a quick reply telling me to
simply return the unit for a replacement. I popped it in to
the car and it worked. Perfect. Absolutely perfect. THANK
YOU! Enfig.com
So,
back to completing the installation. First thing to do was
to remove the head unit and get the info off the box for reference.
Here's the top. |
| View |
|
|
| |
| |

|
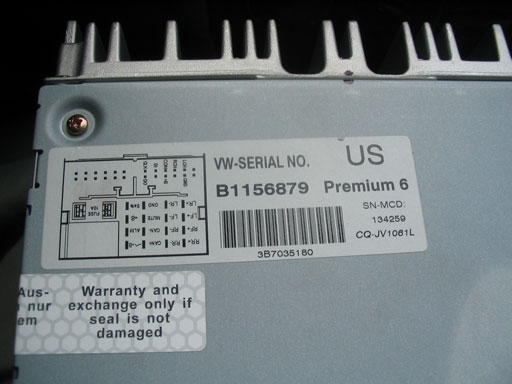
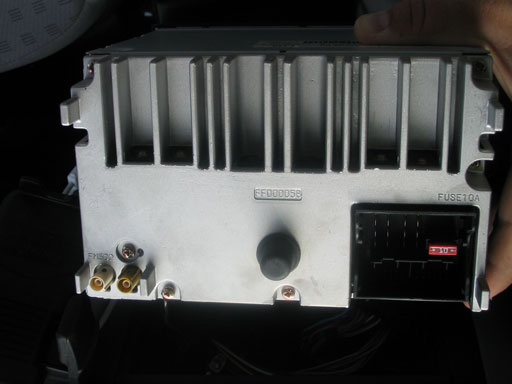
And
here's the back.
Another
note: Something that I thought I would need in this install
was an "Unlocking Code" for my head unit. As I understood
it, the code was needed any time the HU was removed from the
car (read, unplugged) and then reinstalled. The dealer forgot
to write it in my user manual so I had to call them to get
it (I had to pry a bit; apparently they're not supposed to
give it out over the phone, but the cool guy I spoke with
understood and hooked me up). Well, when it came time to reconnect
my factory head unit I did not need it at all. The thing powered
right up and even rememebered the FM programmed stations I'd
set over 2 years ago when I removed it to install the Aiwa
CDC-MP32. Very cool. |
| View |
|
|
| |
| |
|
So,
now that everything is hooked up and works great, I have to
get the HU back into the DIN slot and close up the ash tray
compartment.
This
proved to be a lot harder than I thought. The wires coming
from the BlitzSafe adapter and the harness coming off the
back of the HU are really big and there is not
a whole lot of room behind the HU. Some wiggling and pushing
and I eventually got it to lock into place.
The
ash tray was really tricky too. I managed to scratch some
trim a bit during the install. With the new wires tapped into
the 12V port in the ash tray, it is a very tight squeeze to
get it back into the slot. I had to sort of bend the harness
of the 12V port a bit and slide it in. The trick is to push
it way in, down and then toward you. This is because there
are two hooks that clip onto the metal bar below the ash tray.
You have to get it around the metal bar in order for it to
close properly. Tighten the screw which secures the ash tray
to the metal bar and you're all done. |
| View |
|
|
| |
| |
|
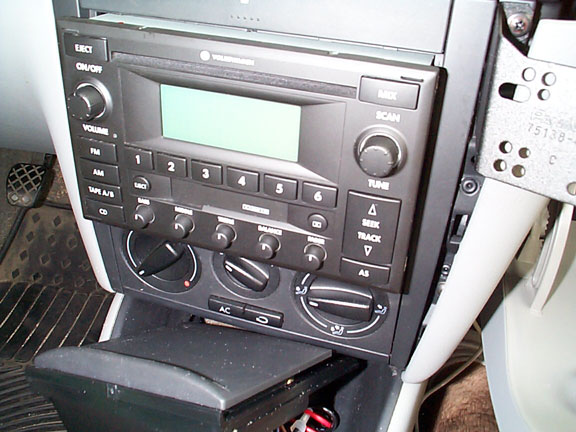
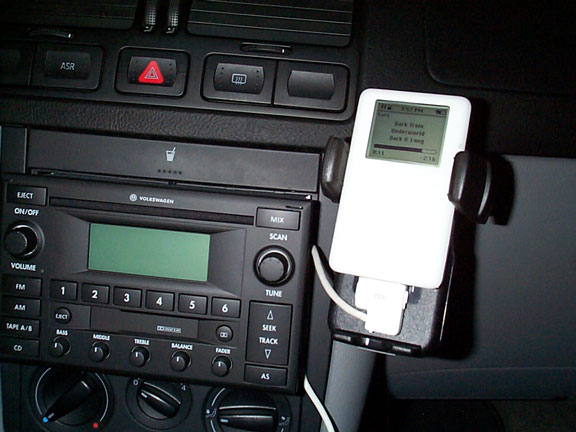
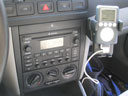
So
here it is all set up and running. The sound is fantastic.
I love it so much more than the Aiwa unit; much crisper and
cleaner. I also like having the OEM controls back. Very pleasing. |
| View |
|
|
| |
| |
|
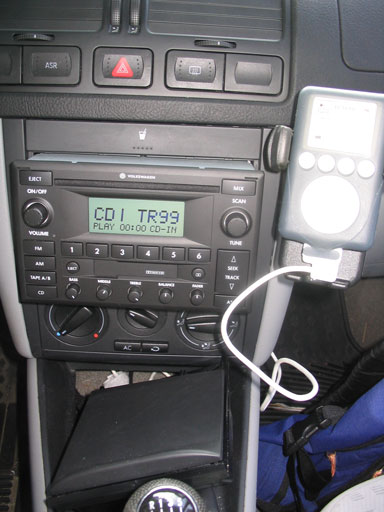
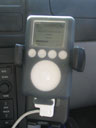
Closeup
on the iPod in the PortaGrip. I have an iSkin
eVo case on my iPod which makes the rubber "fingers"
of the PortaGrip work very nicely. I don't have to squeeze them
too hard and the iPod "floats" above the bottom of
the PortaGrip unit so the iPod is not resting on the power plug.
This is important b/c with all the vibration, if it was resting
on the power plug it could damage the port on the iPod. |
| View |
|
|
| |
| |

|
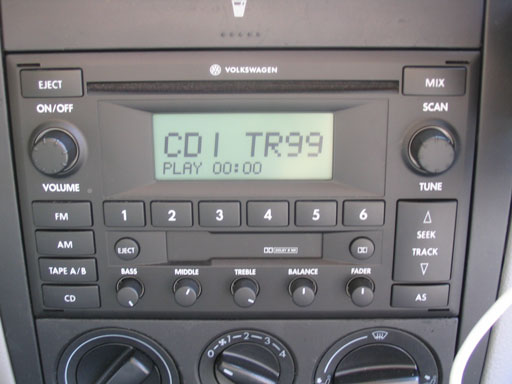
Closeup
on the HU.
If
you have any questions, comments or thoughts, please don't
hesitate to email me at the address below. |
| View |
|
|
all
photos and text © Ben Sullivan | cpl_clegg * at * yahoo.com |
|